
%201-1.webp?width=148&height=74&name=our%20work%20(2)%201-1.webp)


Tailoring your lead statuses in HubSpot according to your unique sales cycle can significantly refine your lead management approach. By crafting custom stages like 'Demo Scheduled' or 'Proposal Sent,' you can strategically guide leads, enhancing engagement and streamlining the conversion journey for improved sales effectiveness. Below are the steps to create custom lead statuses in HubSpot -
Step 1: Accessing Lead Status Settings
- Log in to your HubSpot account.
- In the main navigation menu, click on "Settings."
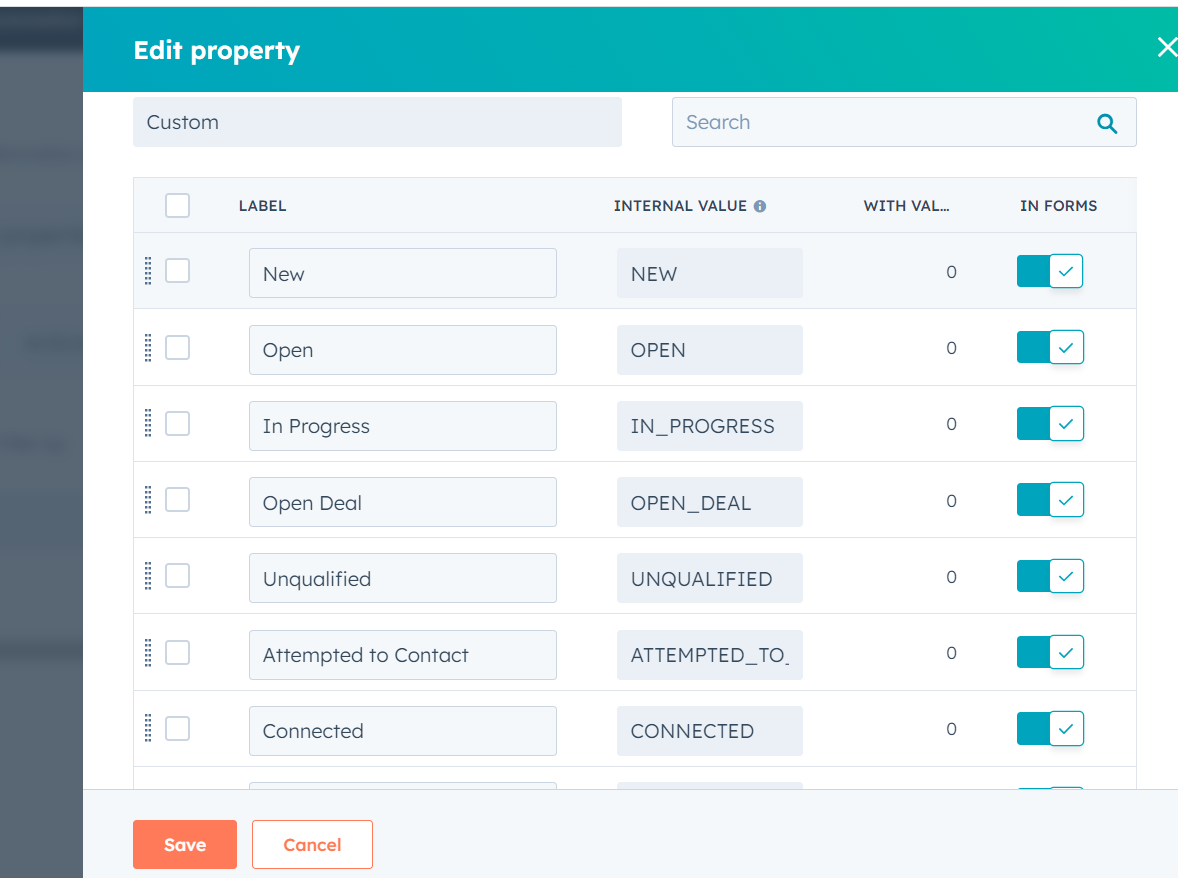
Step 2: Customizing Lead Statuses
- In the left sidebar, navigate to "Objects" and click on "Properties."
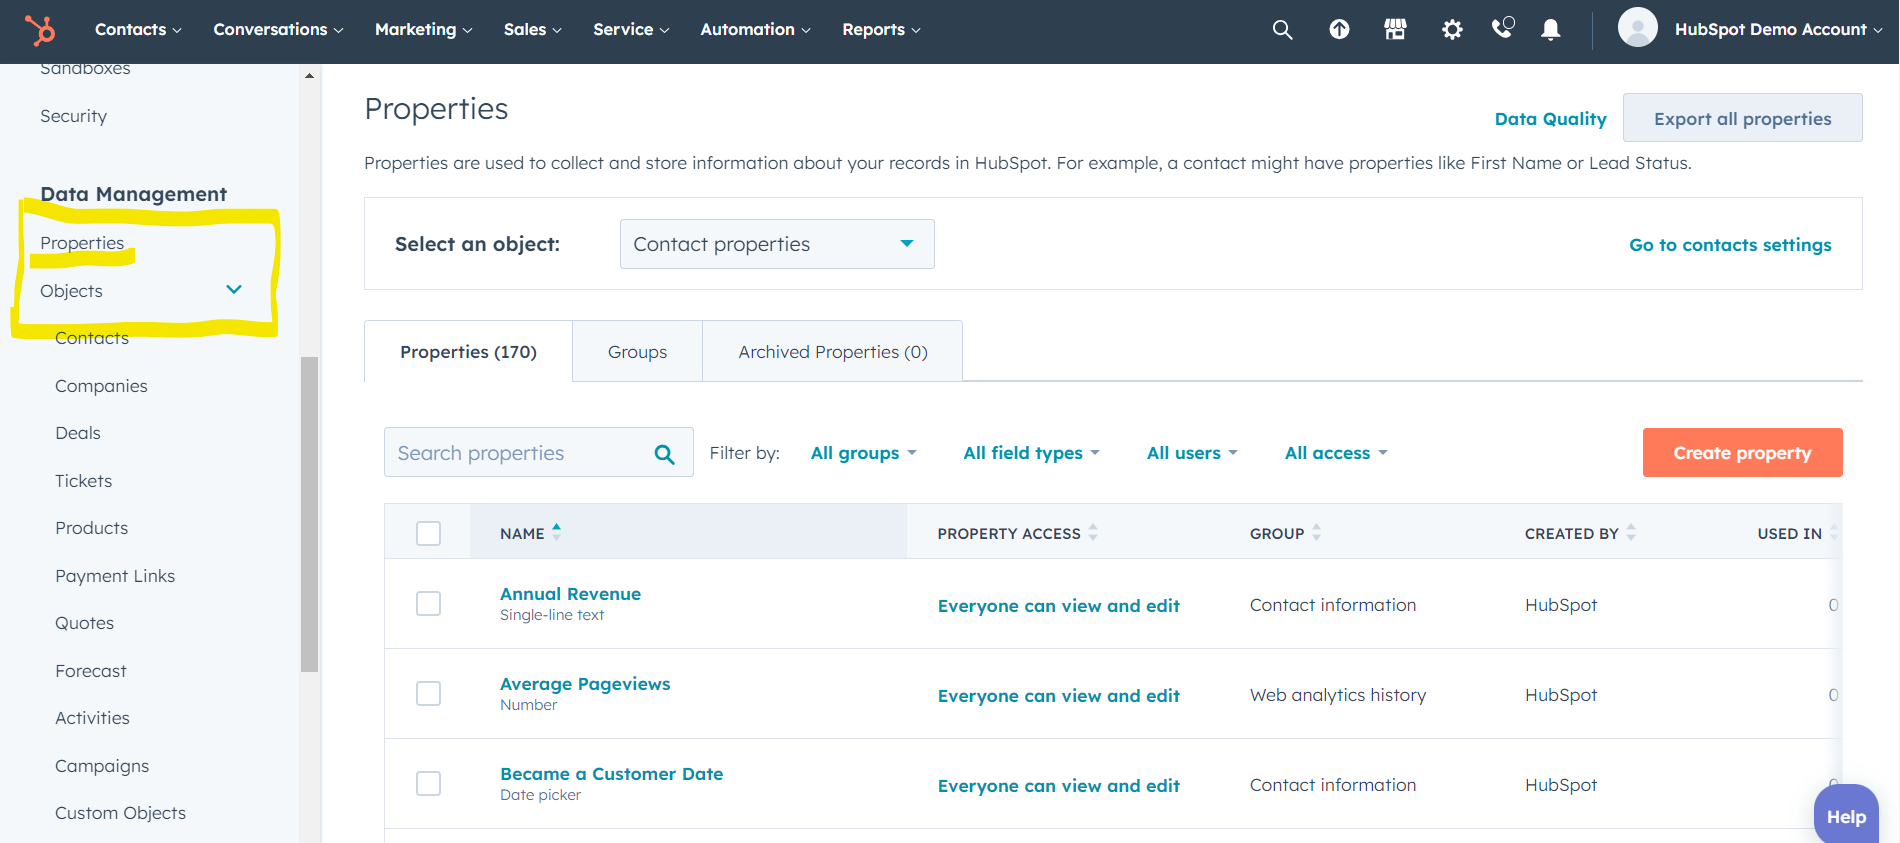
- Use the search bar to find "Lead Status."
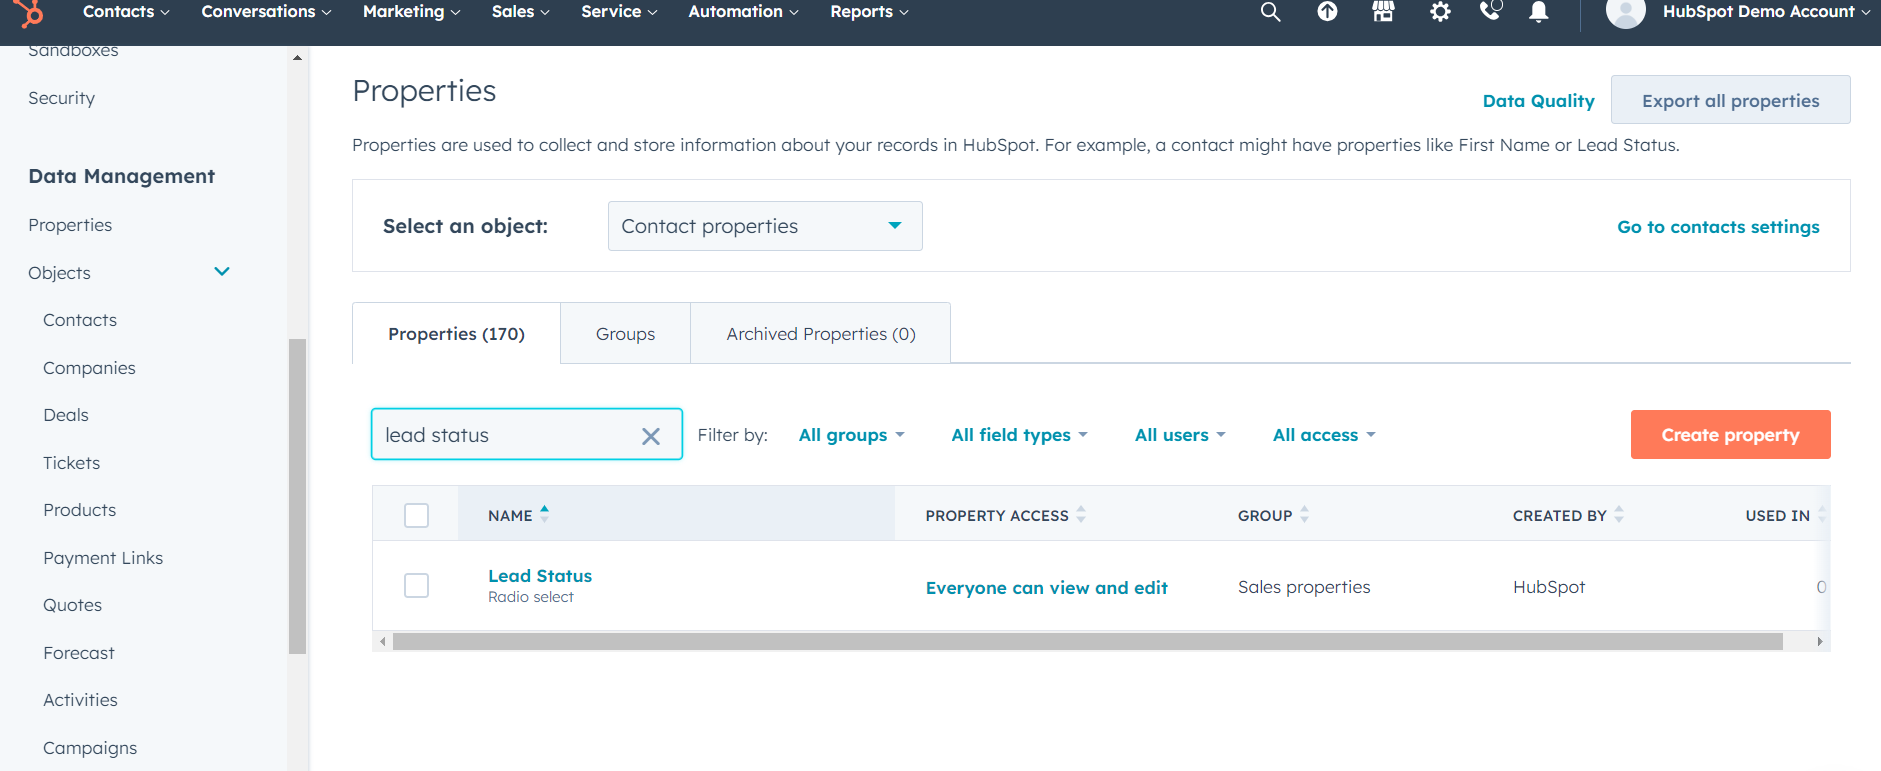
- Click on "Lead Status" to access its settings.
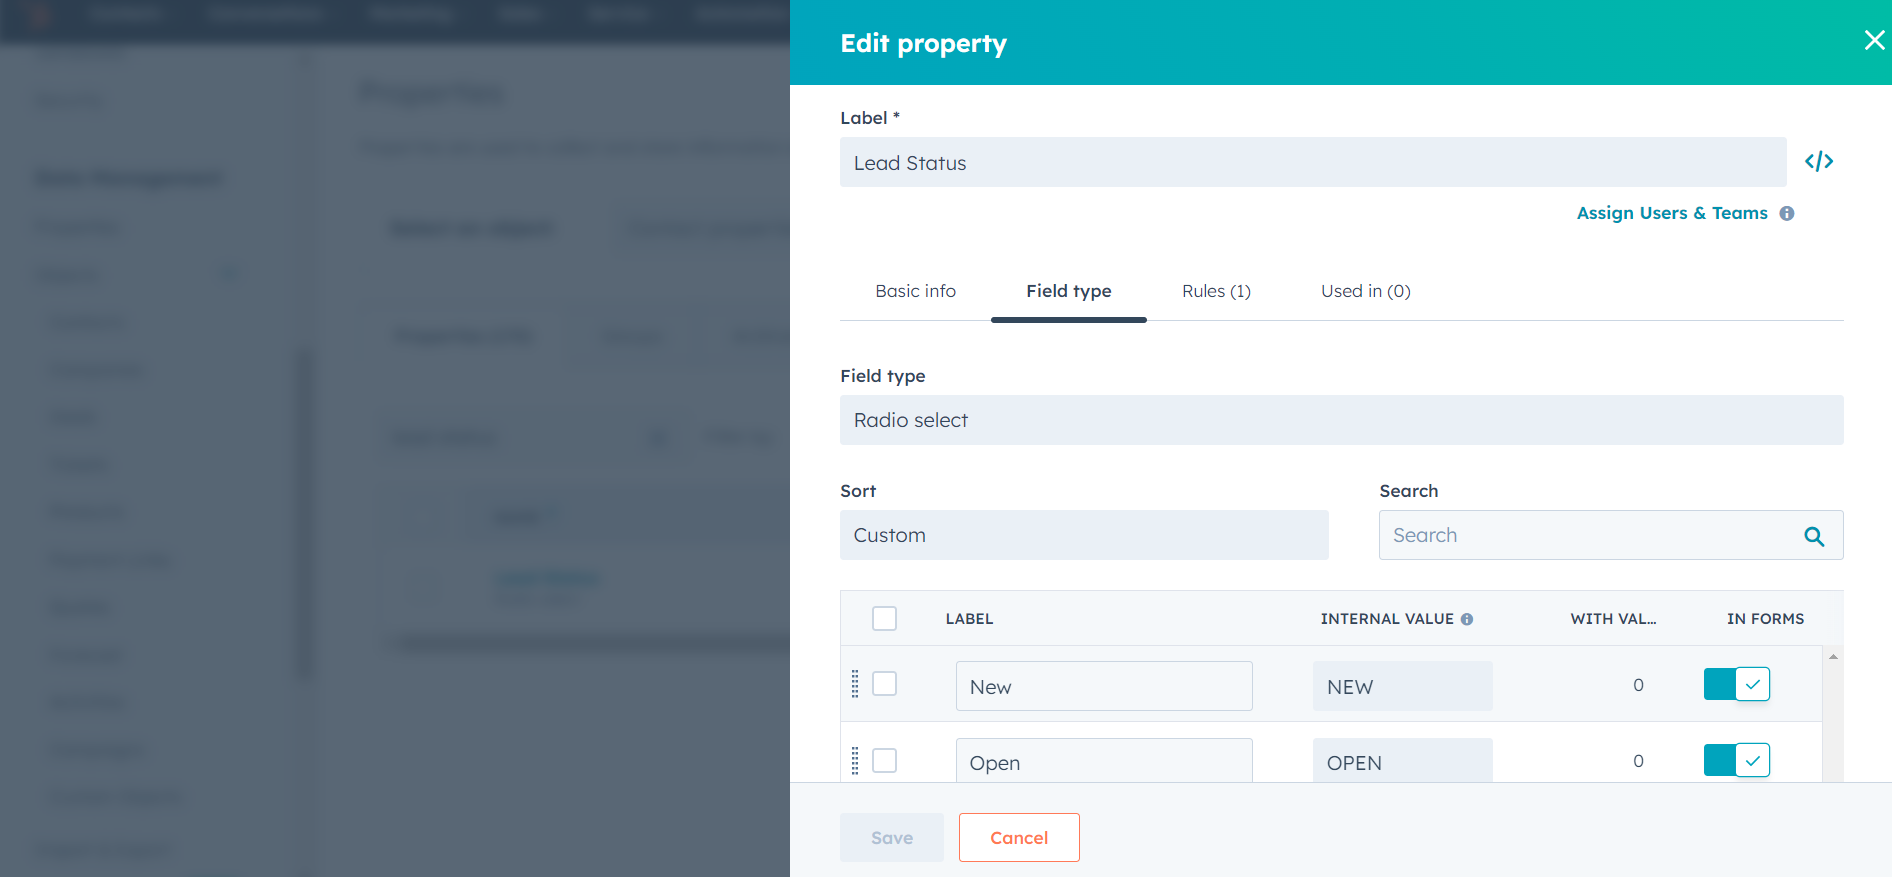
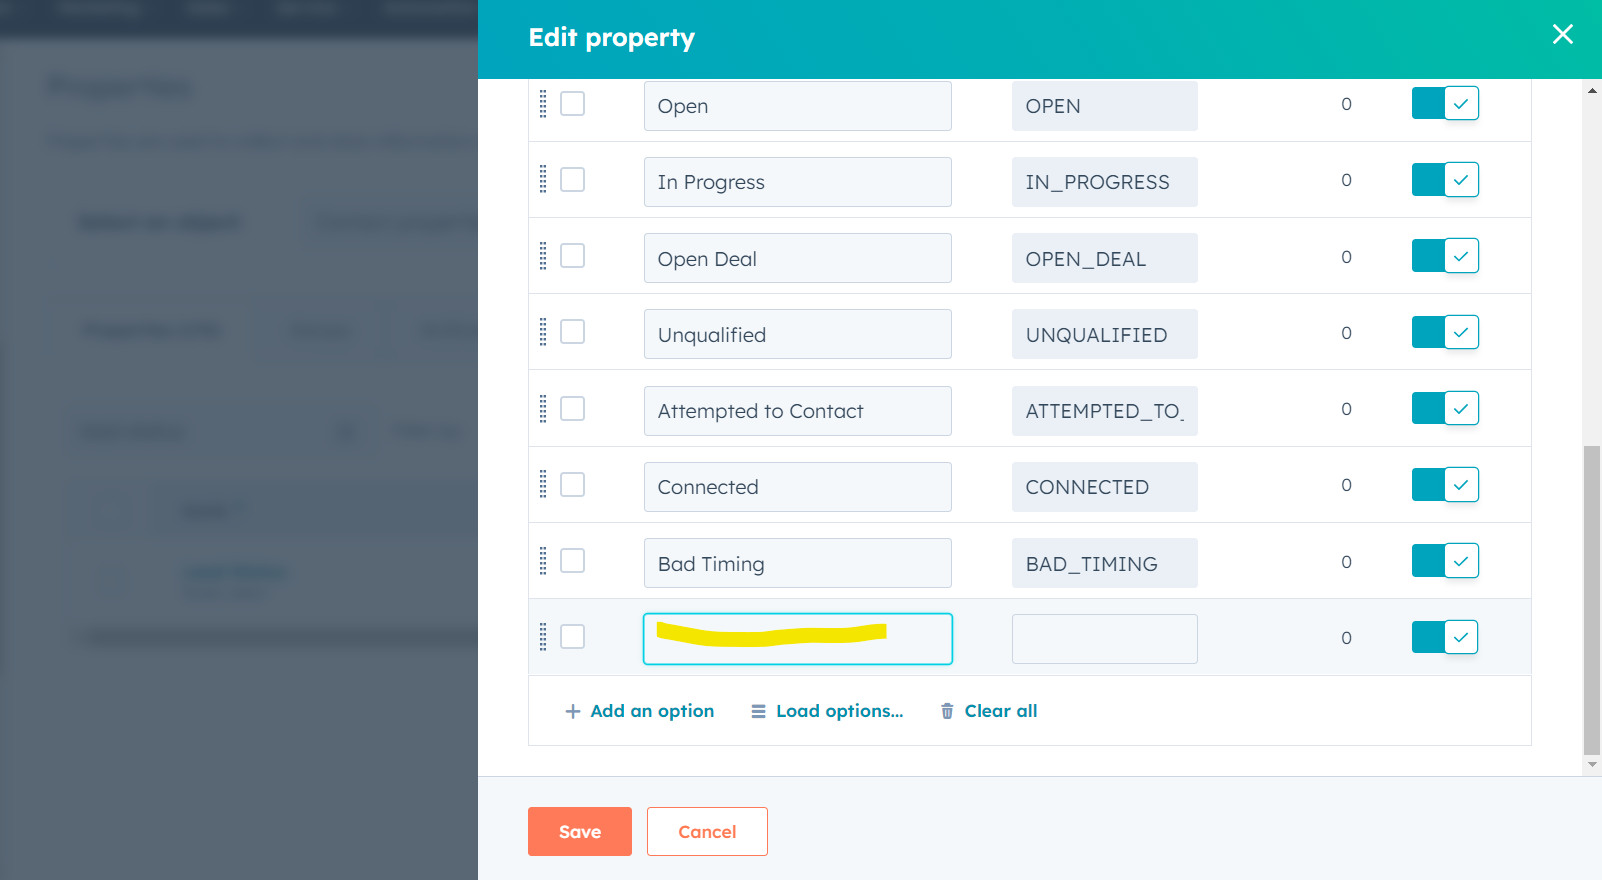
Step 3: Adding Custom Lead Statuses
- Scroll down to the "Options" section.
- Click on the "Add an option" button to create a new lead status.
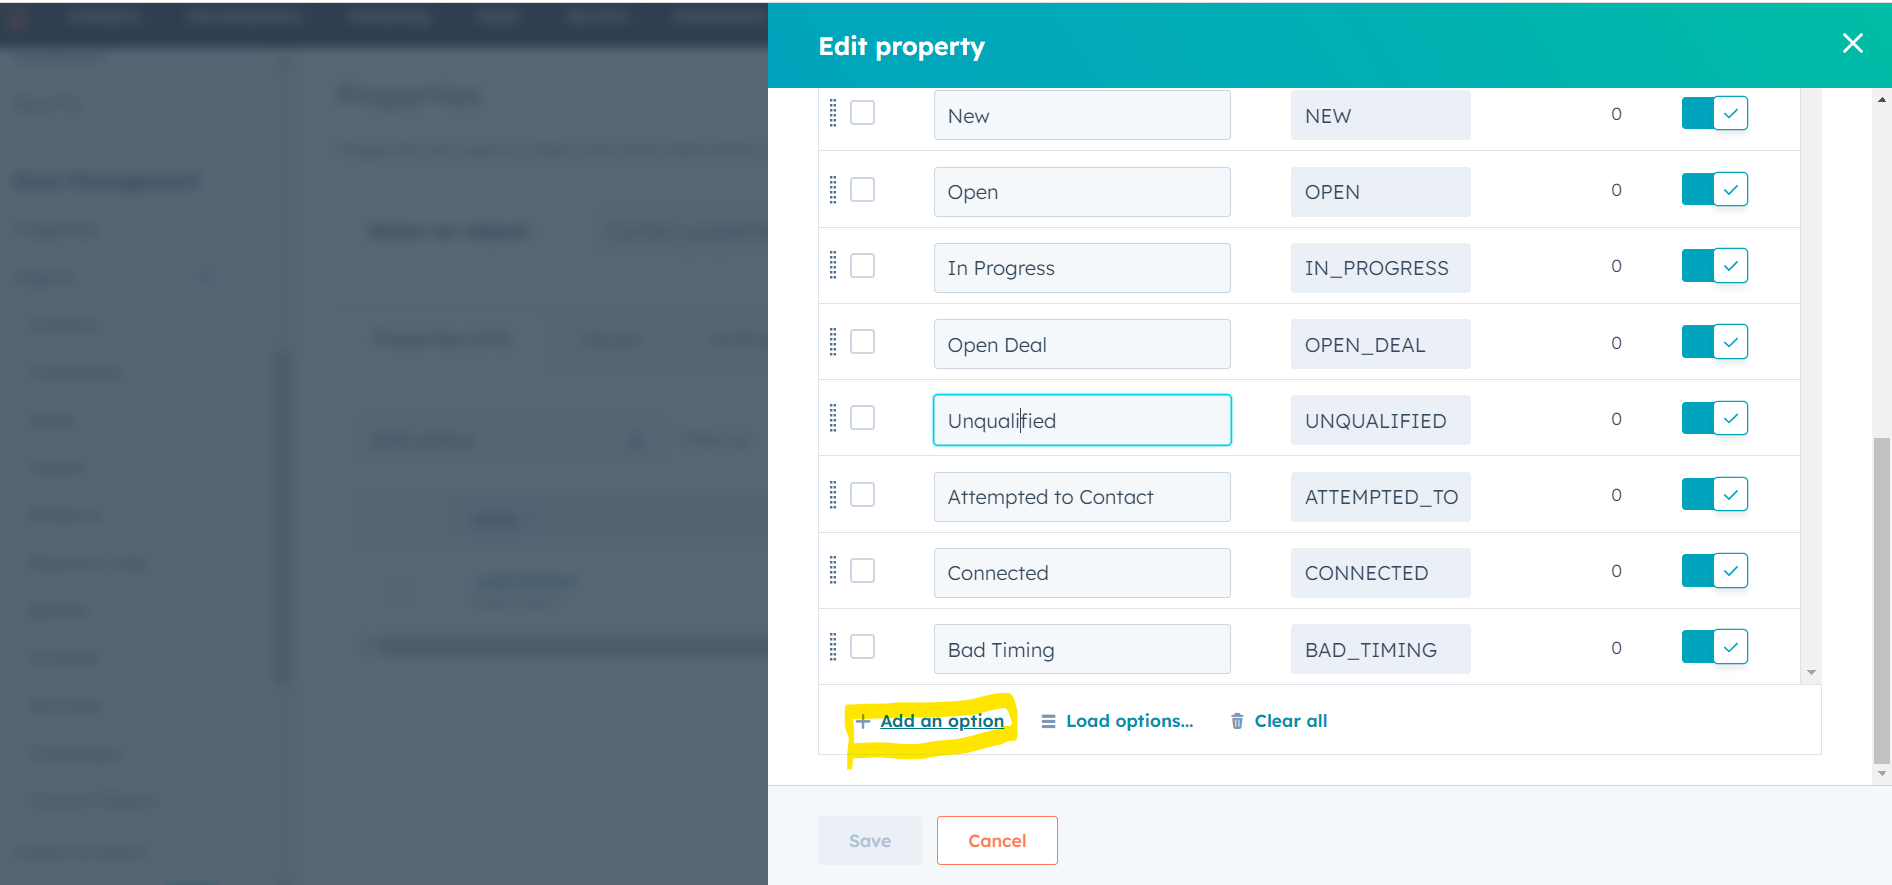
- In the "Option name" field, enter the name of your custom lead status (e.g., "Demo Scheduled," "Proposal Sent").
- Optionally, provide a description in the "Option Description" field to explain the purpose of the new status.
- If you want to control the order of the statuses, adjust the "Sort order" field accordingly.
- Click the "Save" button to add the new custom lead status.
Step 4: Editing and Arranging Custom Lead Statuses
- To modify an existing custom lead status, click on its name under the "Options" section.
- Adjust the name, description, or sort order as needed.
- Click the "Save" button to save your changes.
- To rearrange the order of custom lead statuses, drag and drop them within the "Options" section.
- Click the "Save" button after reordering.
Step 5: Applying Custom Lead Statuses
- After creating and customizing the lead statuses, they will be available when editing a lead's details.
- When editing a lead, click on the "Lead Status" dropdown menu and select the appropriate custom lead status that matches your sales cycle stage.

By following these steps, you'll be able to create and tailor custom lead statuses in HubSpot CRM to precisely match your unique sales cycle. This customization allows for better tracking, more accurate lead management, and an improved alignment of your sales process with the CRM system.


.jpg?width=352&name=Setup%20Automated%20Lead%20Routing%20Rules%20In%20%20in%20HubSpot%20CRM%20(1).jpg)


