%201-1.webp?width=148&height=74&name=our%20work%20(2)%201-1.webp)


Streamlining lead management is crucial for businesses, and HubSpot's customizable lifecycle stages offer a powerful solution. By tailoring distinct stages like 'Subscriber,' 'Lead,' 'MQL,' 'SQL,' and 'Customer,' companies can strategically guide leads through their conversion journey, enhancing engagement and ultimately boosting sales efficiency. Below are the steps -
Step 1: Accessing the Settings
- Log in to your HubSpot account.
- Click on "Settings" in the main navigation menu.
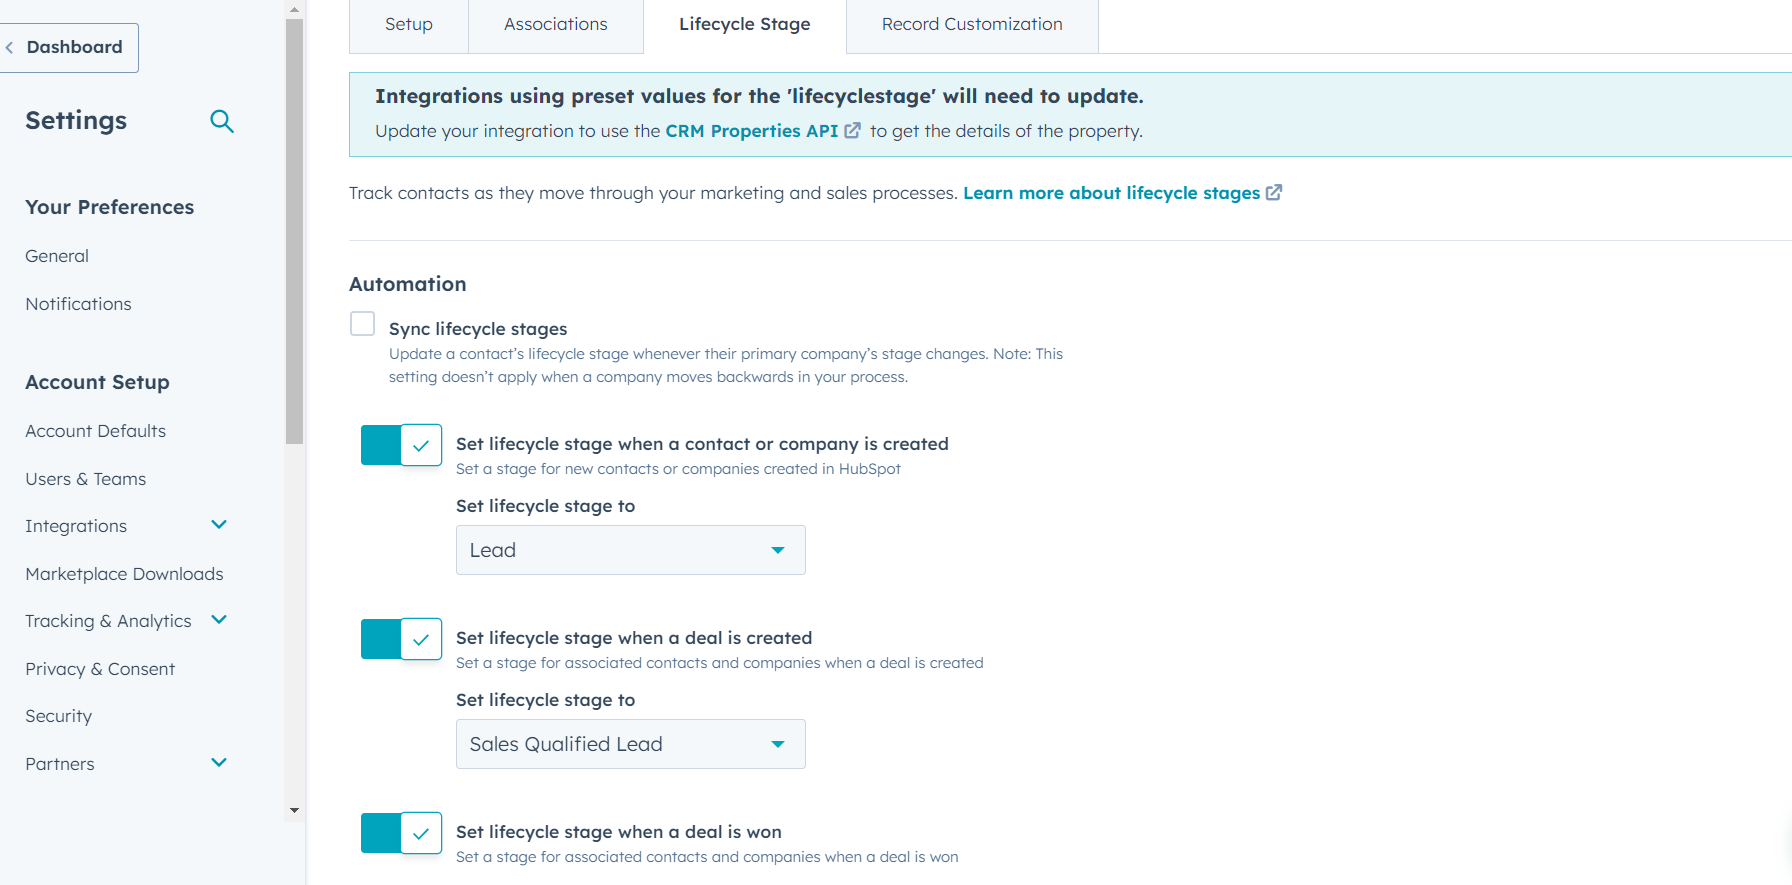
Step 2: Customizing Lifecycle Stages
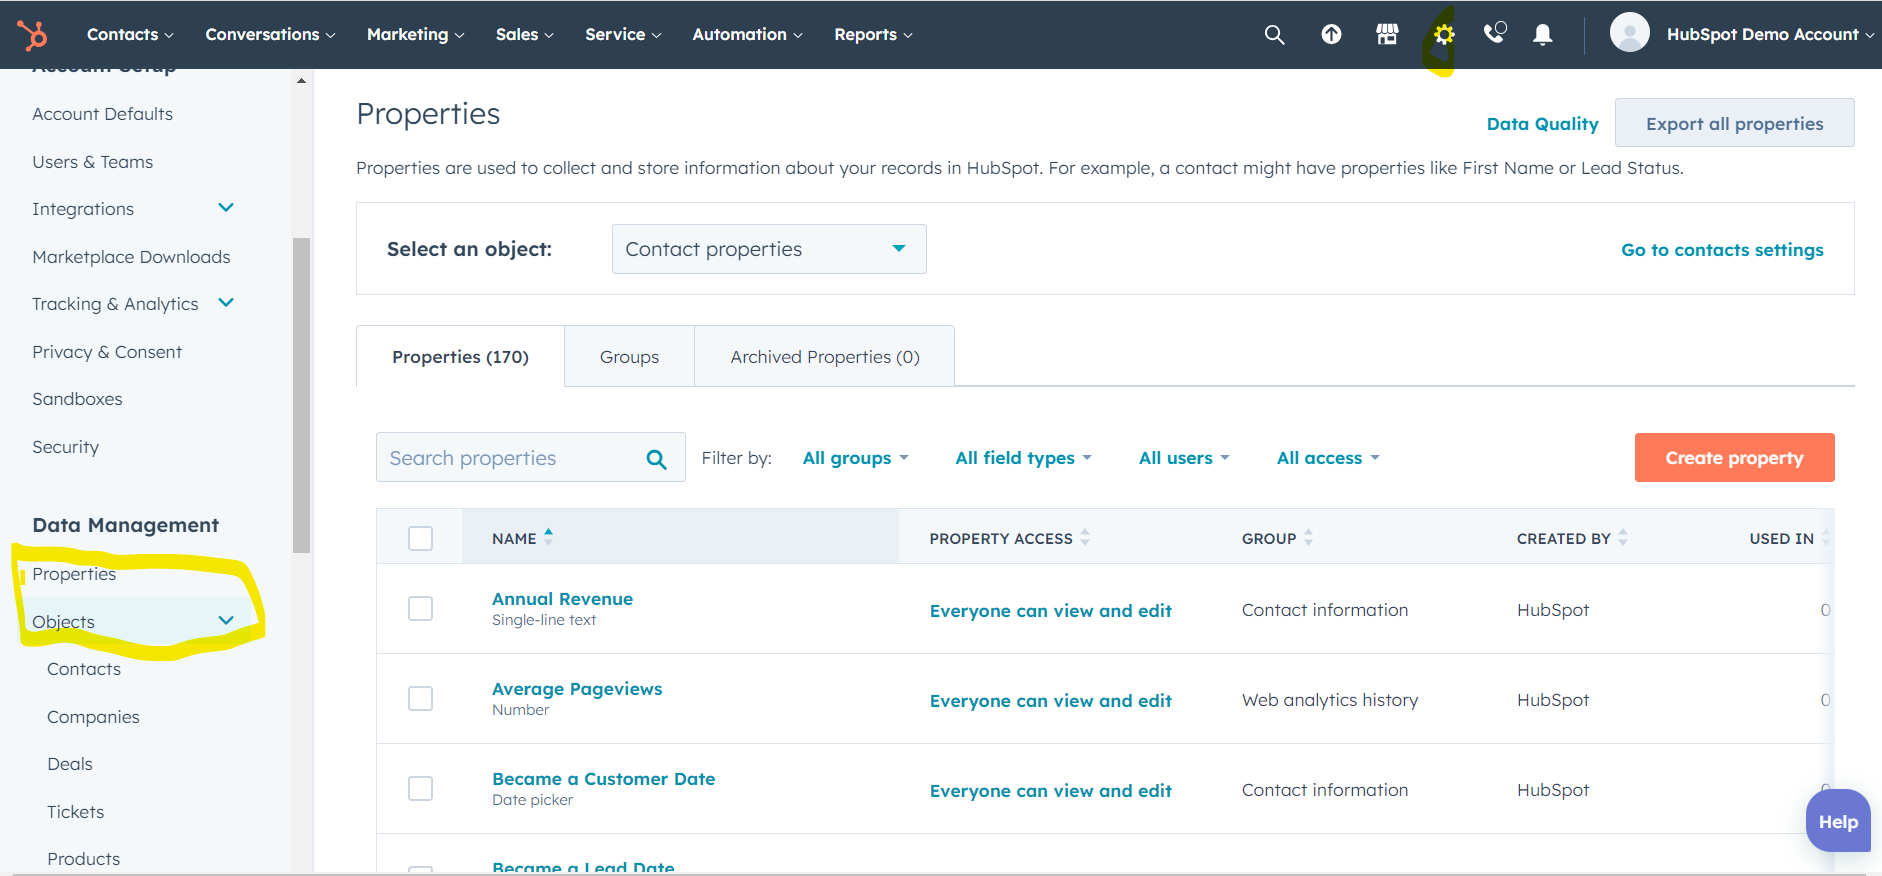
- In the left sidebar, navigate to "Objects" and click on "Properties."
- Search for "Lifecycle Stage" in the search bar.
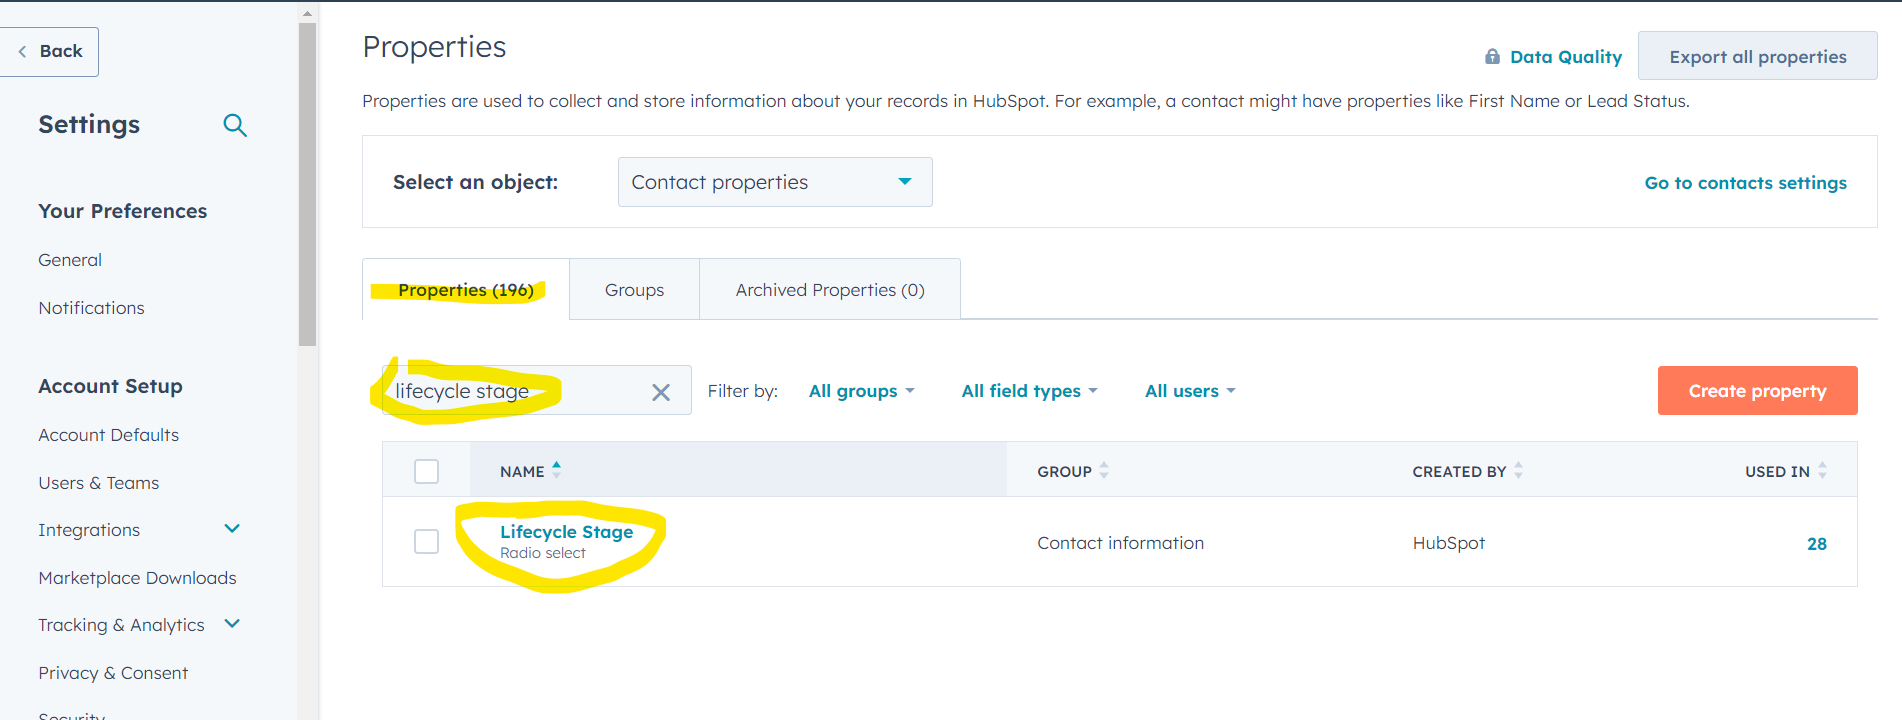
- Click on "Lifecycle Stage" to open its settings.
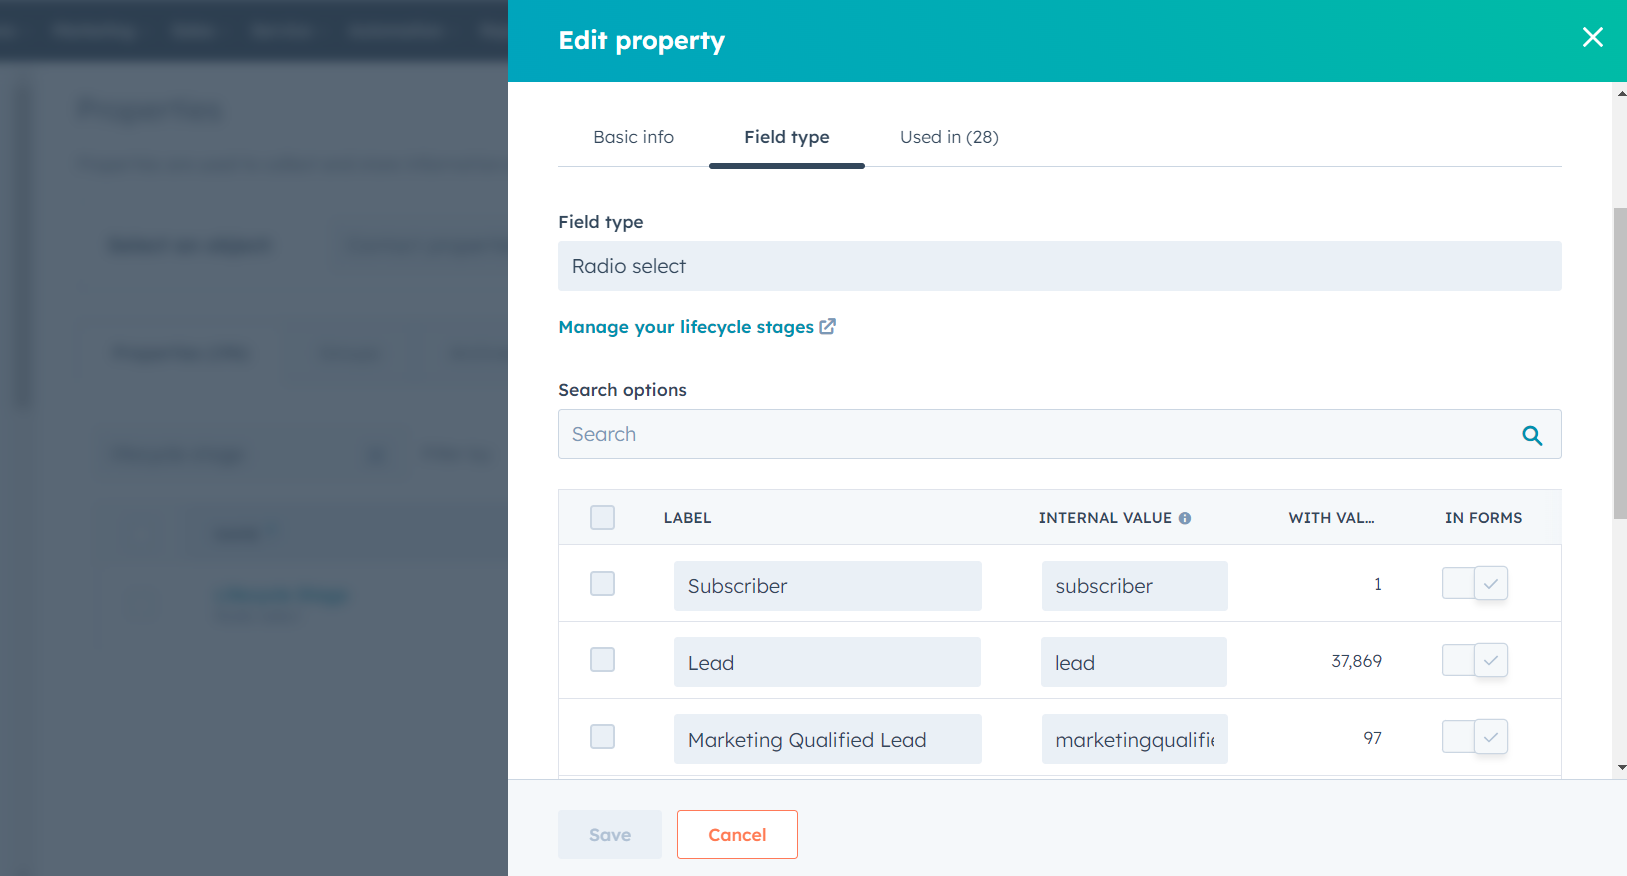
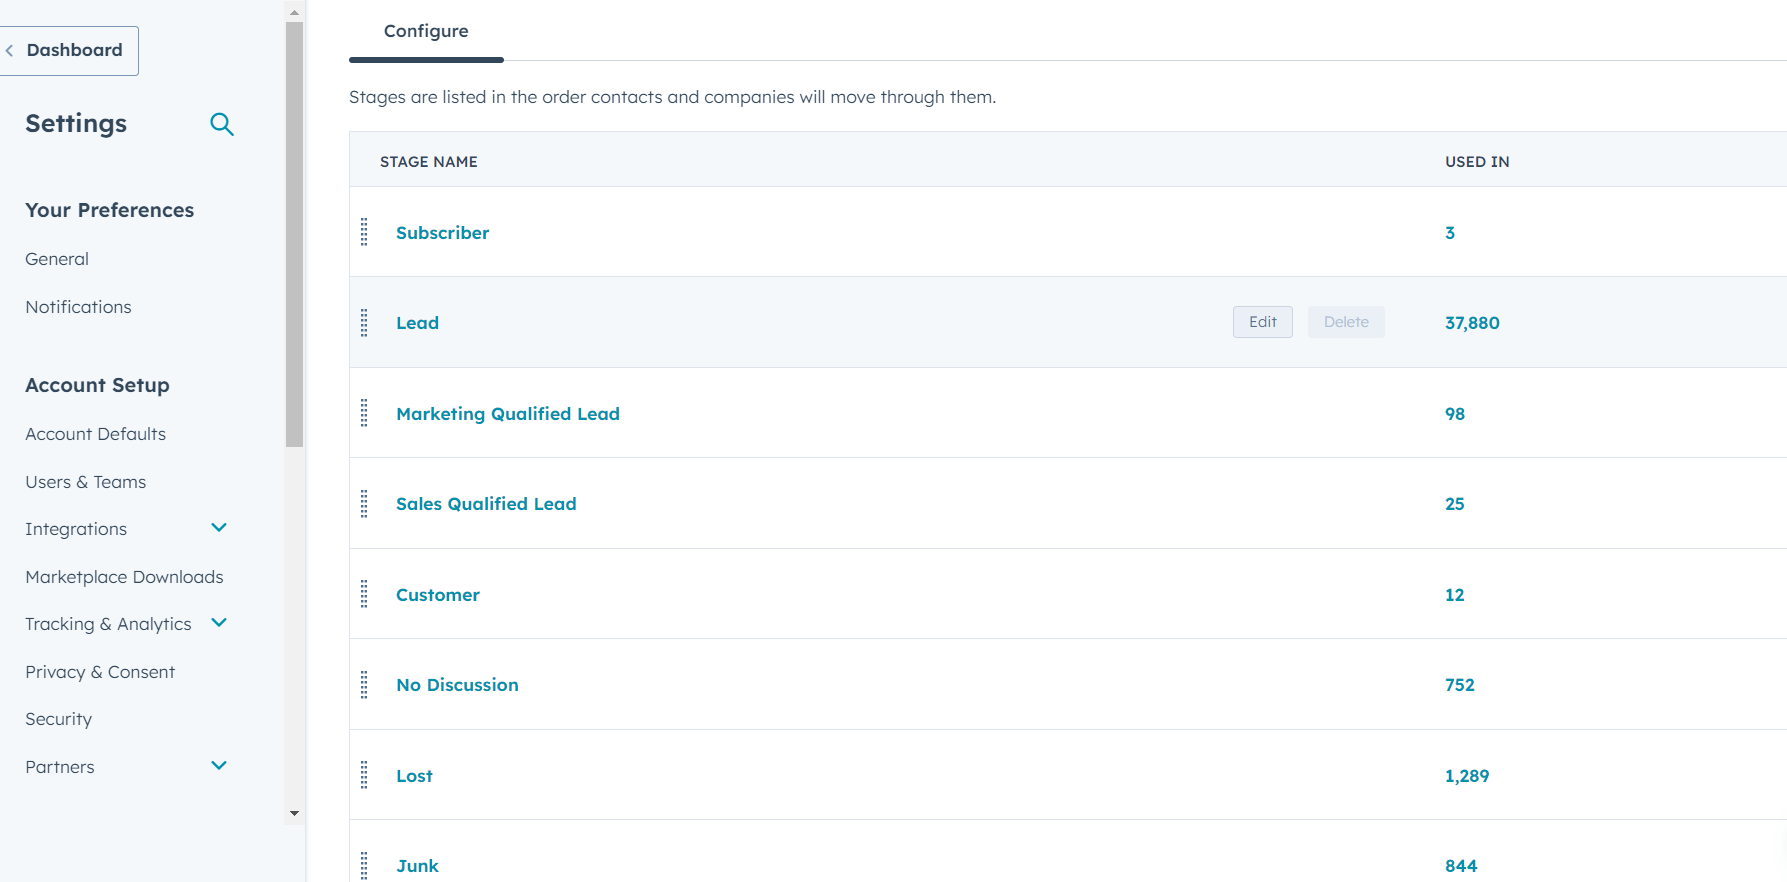
Step 3: Adding New Lifecycle Stages
- Scroll down to the "Options" section.
- Click on the "Add an option" button to create a new lifecycle stage.
- Enter a name for the new lifecycle stage in the "Option name" field. For example, you can add stages like "Subscriber," "Lead," "MQL," "SQL," and "Customer."
- Optionally, you can add a description in the "Option Description" field to provide more context about each stage.
- If you want to change the order of the stages, you can use the "Sort order" field.
- Click the "Save" button to add the new lifecycle stage.
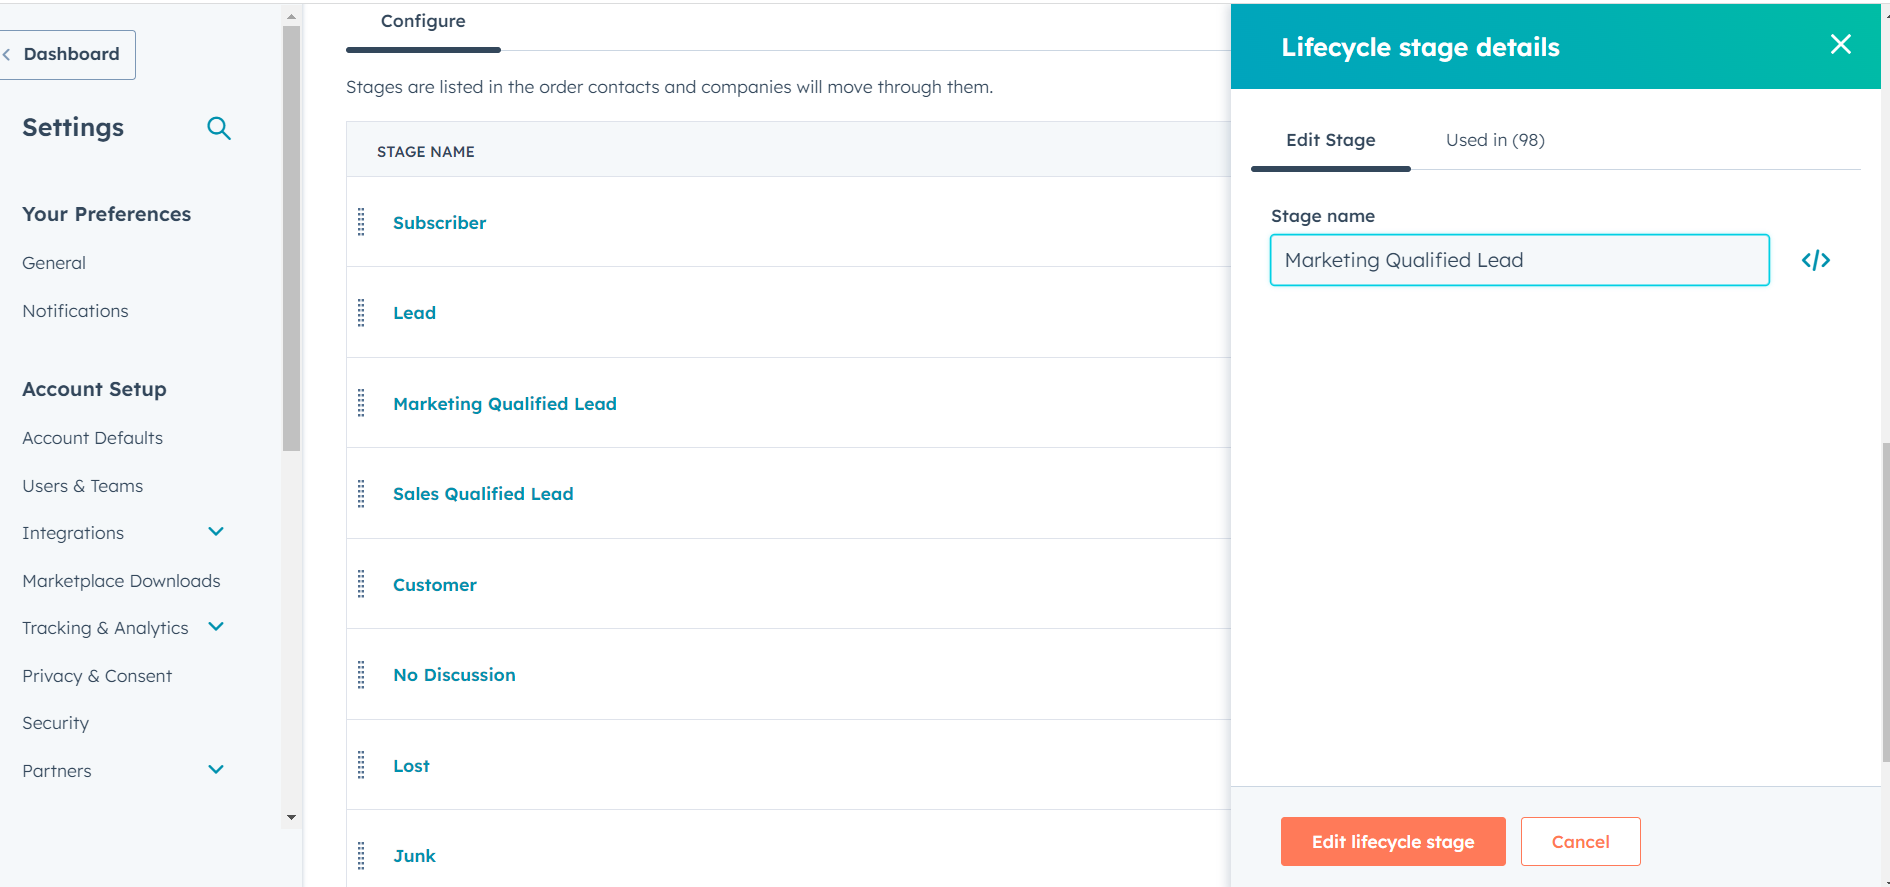
Step 4: Editing Existing Lifecycle Stages
- To edit an existing lifecycle stage, click on the stage name under the "Options" section.
- Modify the name, description, or sort order as needed.
- Click the "Save" button to save your changes.
Step 5: Rearranging Lifecycle Stages (Optional)
- To rearrange the order of lifecycle stages, you can drag and drop the stages in the "Options" section.
- Click the "Save" button after rearranging the stages.
Step 6: Setting Default Lifecycle Stage
- Scroll up to the "Default value" section.
- Choose the default lifecycle stage from the dropdown menu. This is the stage assigned to new contacts by default.
- Click the "Save" button to apply the default lifecycle stage.
Step 7: Applying Lifecycle Stages to Contacts
- Once you've defined and customized the lifecycle stages, they will be available in the "Lifecycle Stage" property for your contacts.
- When creating or editing a contact, you can select the appropriate lifecycle stage from the dropdown menu.

In conclusion, the ability to fine-tune and adapt lifecycle stages within HubSpot equips businesses with a strategic advantage in converting leads to loyal customers. By aligning these stages with specific criteria and refining the progression path, companies can cultivate personalized interactions, optimize resource allocation, and achieve greater success in today's competitive market landscape.