%201-1.webp?width=148&height=74&name=our%20work%20(2)%201-1.webp)


Use the Design Manager tool to build custom-coded modules for blogs, pages, or emails. Custom modules offer diverse functionalities, enabling full content customization within the editor.
Note: Module creation requires expertise in HTML, CSS, HubL, and HubSpot's Design Manager. Working with a developer is recommended.
To Create a New Module
- Navigate to Marketing > Files and Templates > Design Tools.
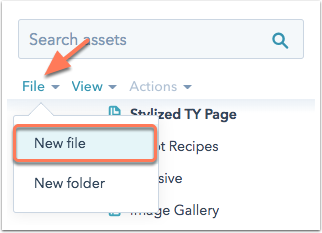
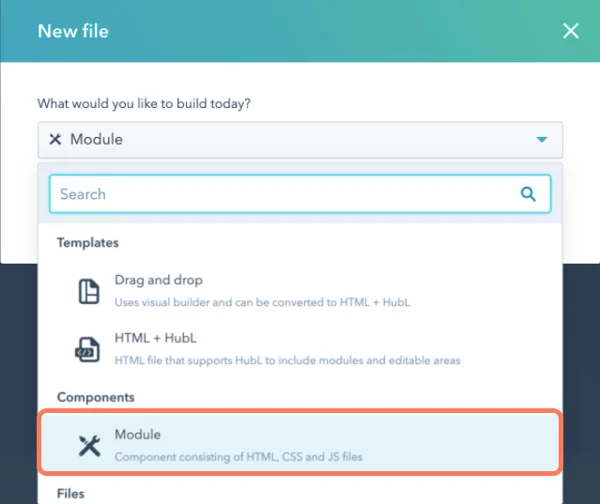
- Click the "File" dropdown, select "New file," and choose "Module."
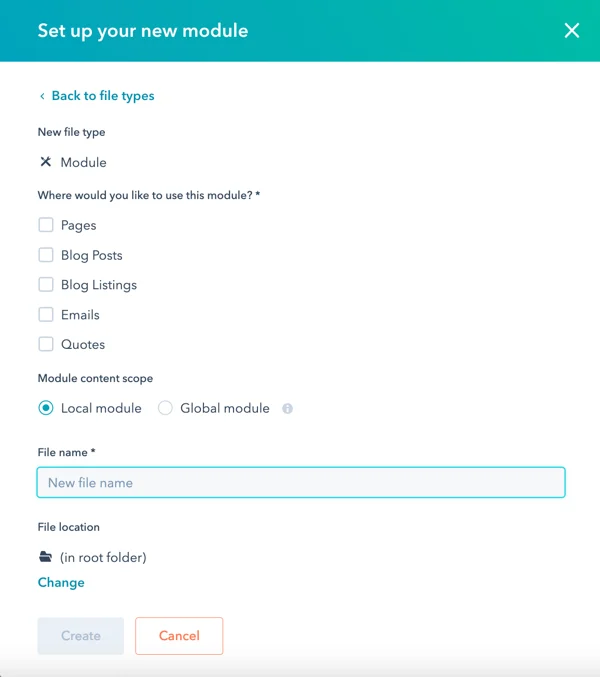
- Select where the module will be used: pages, blog posts, blog listings, emails, or quotes (emails can't include CSS/JavaScript).
- Choose if the module will be local or global. Editing a global module affects all its instances.
- Enter a file name and create the module.
Label Your Module
- Customize how the content editor references the module by assigning a label.

Adding Fields to Your Module
- Customize your module's content and styling by adding fields for easy editing in the content editor.
- Learn about available field types in the developer documentation.
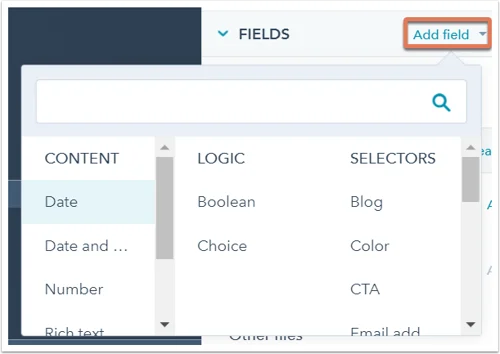
To Add a Field:
- In the module inspector on the right, go to the "Fields" section.
- Click the "Add field" dropdown and select a field to include in your module.
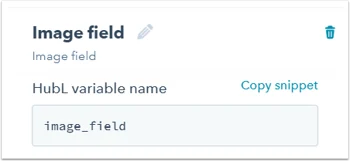
- Edit the field name by clicking the pencil icon next to it. Modify the HubL variable name in the text field if needed.
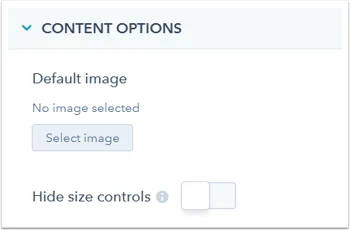
Add Default Content to Fields
- In the "Content Options" section, set the default content that appears when the module is used in templates and content editors. Default content options vary based on the field type.
Set Field Editor Options
- In the "Editor Options" section, enable options for how users can edit the module in the content editor:
- Make this field required: Users must complete this field.
- Prevent editing in content editors: Field content can't be edited within the content editor but remains editable at the template level.
- Tooltip help text: Add contextual or instructional help text, displayed in a tooltip when users hover over the field.

- Inline help text: Provide context or instructions below the field while users edit the module.

Set Field Display Conditions
- Use field display conditions to make a module field appear based on criteria from another area.
- In the "Display Conditions" section:
- Select a module field from the HubL variable dropdown.
- Choose a condition from the "is not empty" dropdown.
- Optionally, add a value or regex if you select the "is equal to" condition.
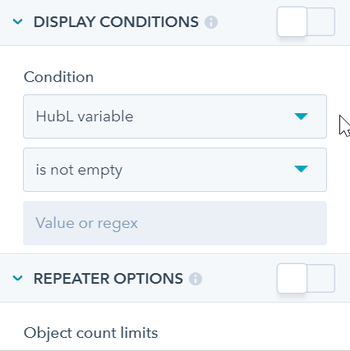
- The display conditions are automatically enabled once you set them. Toggle off the switch to disable them.
Setting Field Repeater Options
- Use the Repeater Options section to configure your field as a repeater, creating multiple objects displayed using a for loop.
- Select the minimum and/or maximum required instances of this field.
- Optionally, set a default object count, determining how many instances of the field appear by default in the module.
- The example below sets the image field as an image slider with 3 to 5 image fields as the limits. The module displays 4 image fields by default, and users can add or remove images accordingly.

To Set Repeater Options
- In the Repeater Options section, define the minimum and/or maximum required instances.
- Optionally, set a default object count.
- The repeater options are automatically enabled when modified. Disable them using the toggle switch on the right of Repeater Options.
Grouping Module Fields
- Organize fields by relevance by grouping up to 4 of them together.
- Field groups help build custom field logic for easier management.
To Group Module Fields:
- In the module editor's right sidebar, click "Group."

- Select the fields you want to group.
- Click "Create group."
Copy and Paste Field Snippets
- To incorporate a field into the module, copy and paste the field snippet into the module's HTML + HubL editor.
- From the field inspector, click "Copy snippet" next to the field's HubL variable name.
- From the module inspector over the field, click "Actions," and choose "Copy snippet."r, h
- Paste the snippet into the HTML + HubL editor by pressing Ctrl+V (Windows) or Cmd+V (Mac).

Module Editing and Help Text:
- Edit your module using HTML + HubL, CSS, and JS editor panes for advanced customization.
- Add contextual help text in the "Editor options" section (max 300 characters).
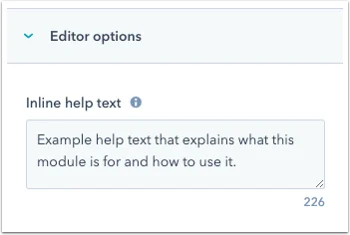
- The help text appears above module fields when users edit the module in a content editor.

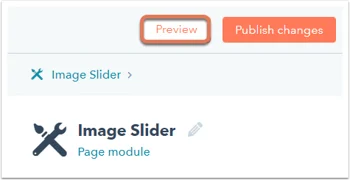
Previewing Your Module
- Click the "Preview" button in the upper right of the module editor.
- Preview how your module will look and function in the content editor.
- The preview syncs with the editor, automatically updating as you work.
Publishing Your Module
- After adding fields and writing module syntax, click "Publish changes" in the upper right to publish your module.

Making Your Module Available for Templates
- Enable the "Make available for templates" toggle (top right) to use the module across templates.
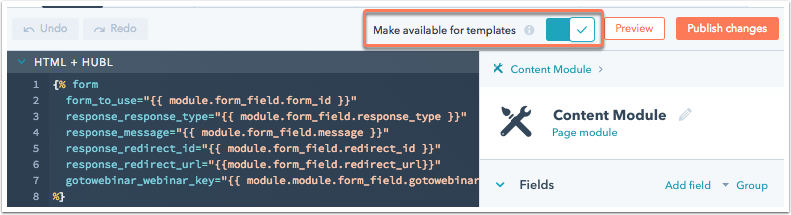
- Disable the toggle to make changes or test the module's functionality.
- If disabled, an alert will inform your team that the module is not available for templates.

Adding Your Module to a Template
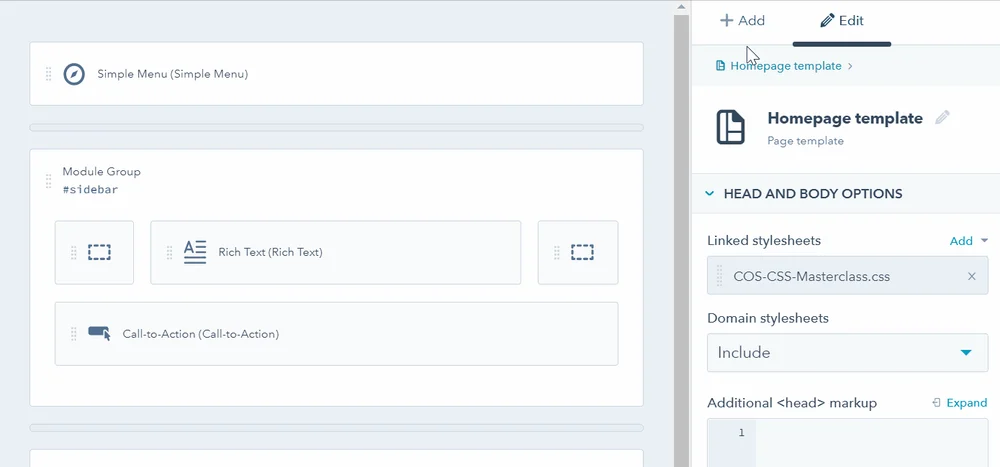
For Drag-and-Drop Template
- In the template layout editor, click "Add" at the top of the layout inspector.
- Search for your module, identified by the custom module icon: custom modules.
- Drag and drop the module into the template.
For Coded Template:
- Copy the module snippet from the module editor by clicking "Copy snippet" at the bottom of the right sidebar.
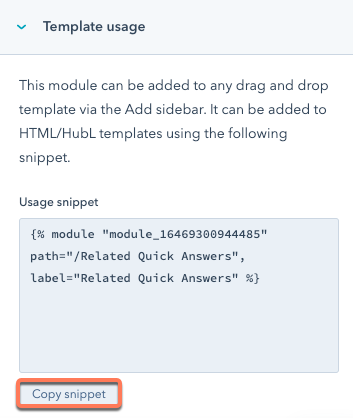
- Alternatively, copy the module snippet from the left sidebar of the design manager by right-clicking the custom module and selecting "Copy snippet," or click "Actions" in the upper left and choose "Copy snippet."

- Paste the copied snippet into the coded template where needed.