%201-1.webp?width=148&height=74&name=our%20work%20(2)%201-1.webp)


It's crucial to assign an author when publishing a blog post on HubSpot. You can choose to add authors to your blog either through the Authors dashboard or the Settings section of a specific blog article. You have a choice to change or eliminate authors once they've been added, if necessary.
Additionally, HubSpot creates individual sites for each author that highlight all of their published blog content. These pages have a meta description that offers a brief author biography and is titled "[Blog name] [Author name]."
Create a New Blog Author
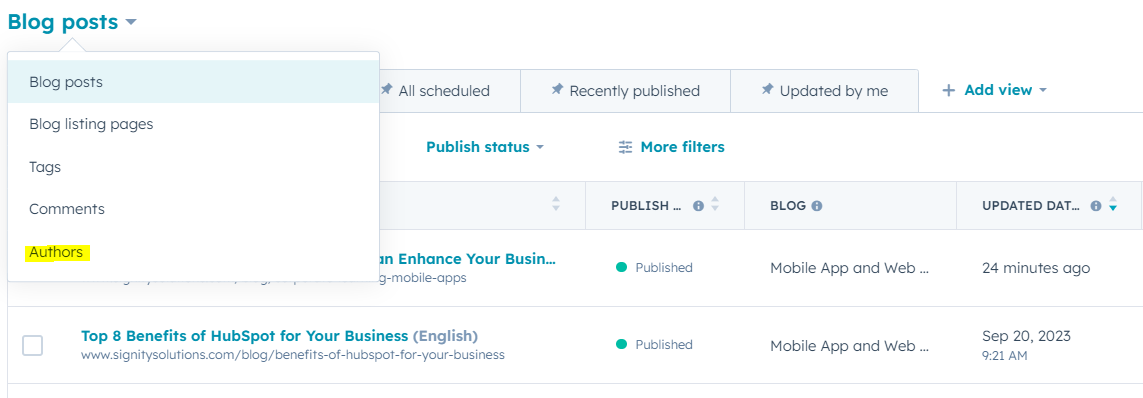
- Within your HubSpot account, go to Marketing > Website > Blog.
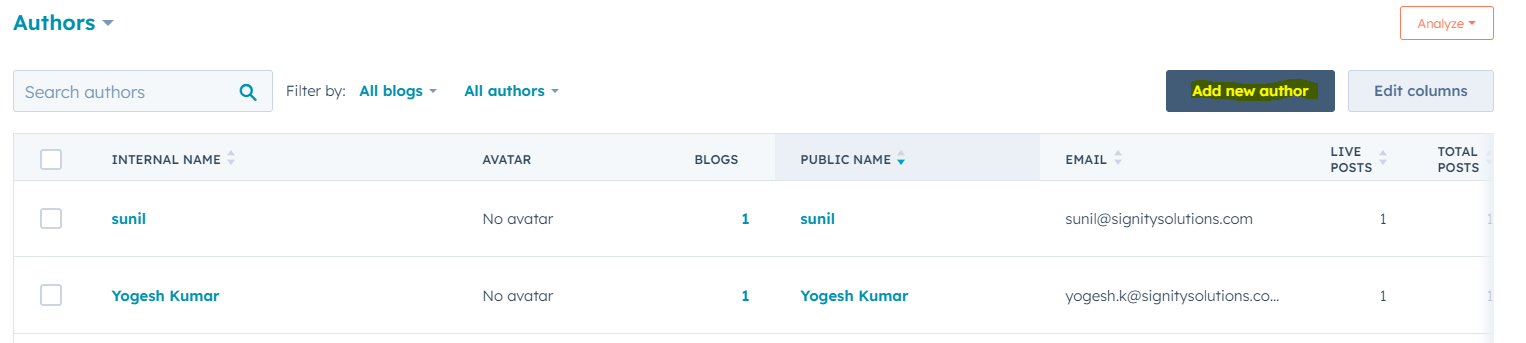
- In the top-left corner, access the Blog posts dropdown menu and choose Authors.
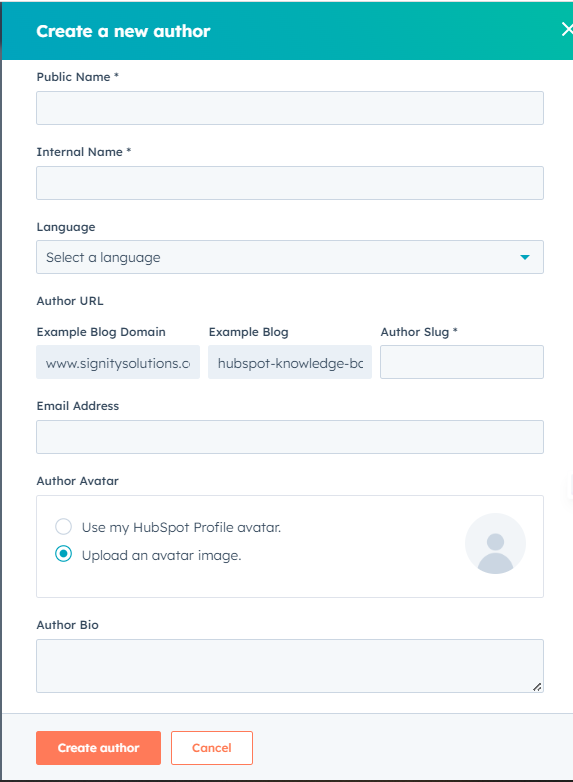
- In the right-hand panel, add your new author details.
- The mandatory fields include:
- Public Name: This is the author's name displayed on published blog posts.
- Internal Name: The author's name as it appears within the Authors dashboard in the blog tool.
- Author Slug: A unique string for the author's URL. The remaining part of the URL is generated based on the blogs where the author's content is featured.
- Optional fields include:
- Language: The primary language in which the author creates content. This field is only necessary if authors produce blog content in multiple languages.
- Email Address: The author's email contact.
- Author Avatar: An image representing the author, which can be the author's HubSpot profile picture or a custom avatar uploaded from the files tool.
- Author Bio: A brief description or biography of the author.
- Website: The author's personal website.
- Facebook/Twitter/LinkedIn: Links to the author's social media profiles.
- Click on the "Create author" button.
This newly created author can now be added to posts in any blog hosted on HubSpot.
Edit a Blog’s Author Profile
- Within your HubSpot account, go to Marketing > Website > Blog.
- In the top-left corner, access the "Blog posts" dropdown menu and choose "Authors."
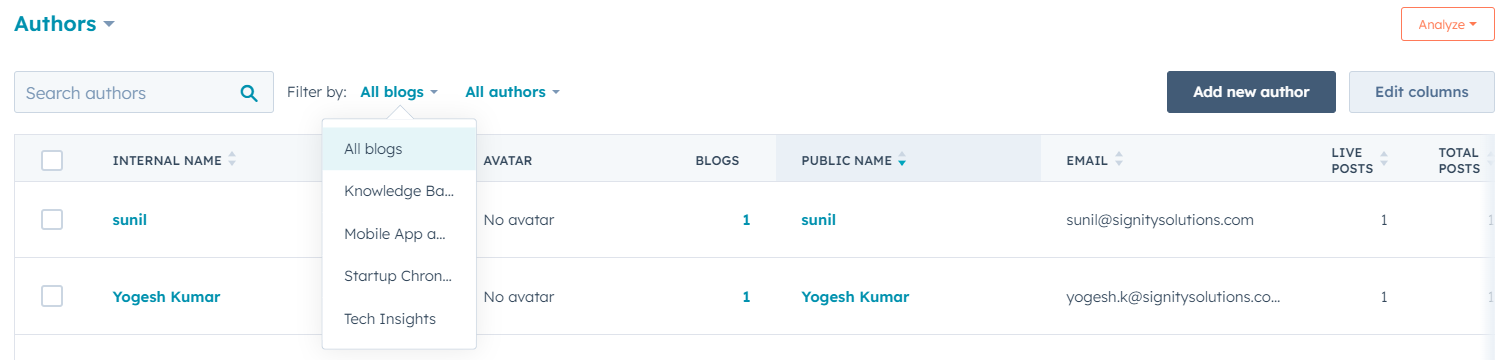
- At the top-left corner, apply filters to narrow down the authors:
- To filter by a specific blog, click the "All blogs" dropdown menu and pick a blog.
- To filter by an author's publishing status, use the "All authors" dropdown menu and select either "Active" or "Inactive."
- Hover your cursor over an author and choose "Edit full profile."
- Input the author's profile details, then click "Update blog author" to make the changes live.
Add a Blog Author to a Post
- Within your HubSpot account, proceed to Marketing > Website > Blog.
- Hover your mouse over a blog post and select the "Edit" option.
- In the content editor, go to the "Settings" tab.
- Access the "Author" dropdown menu, where you can either choose an existing author or click "Create a new author" to establish a new one.
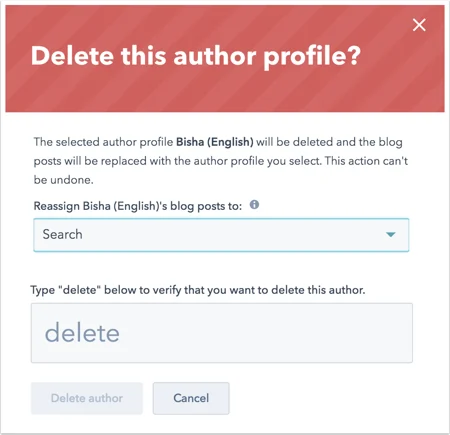
Delete a Blog Author
When you remove an author, you will need to assign their blog posts to another author in your account. To delete an author, follow these steps:
- In your HubSpot account, go to Marketing > Website > Blog.
- In the top-left corner, open the "Blog posts" dropdown menu and choose "Authors."
- On the author dashboard, hover over the author you wish to delete, then click the "More" dropdown menu and select "Delete."
- From the "Reassign blog posts to" dropdown menu, select an author to whom you want to transfer the live posts of the author being deleted. This option will not be visible if the deleted author has no live posts.
- Type "delete" to confirm your intention to delete this author.
- Finally, click on "Delete author."


.jpg?width=352&name=_Choose%20the%20Best%20HubSpot%20Consulting%20Services%20(1).jpg)