%201-1.webp?width=148&height=74&name=our%20work%20(2)%201-1.webp)


.jpg?width=670&height=445&name=_Choose%20the%20Best%20HubSpot%20Consulting%20Services%20(1).jpg)
Tags enable you to organize your blog posts based on topics. After incorporating tags into your posts, you can tailor your templates to include links to tag-specific post feeds. Additionally, you have the option to integrate a post filter module, allowing visitors to easily sort posts by tag.
Create a Blog Tag
To create a new blog tag in HubSpot:
- Go to Marketing > Website > Blog.
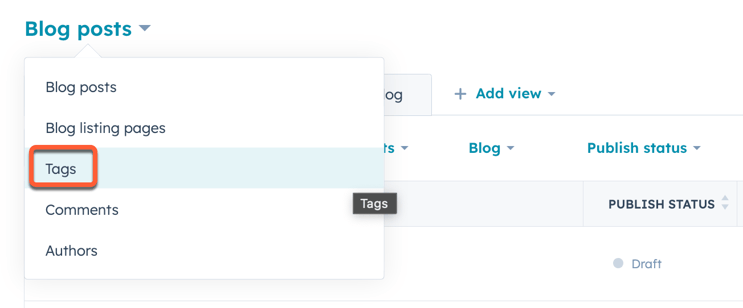
- Click Blog posts > Tags.
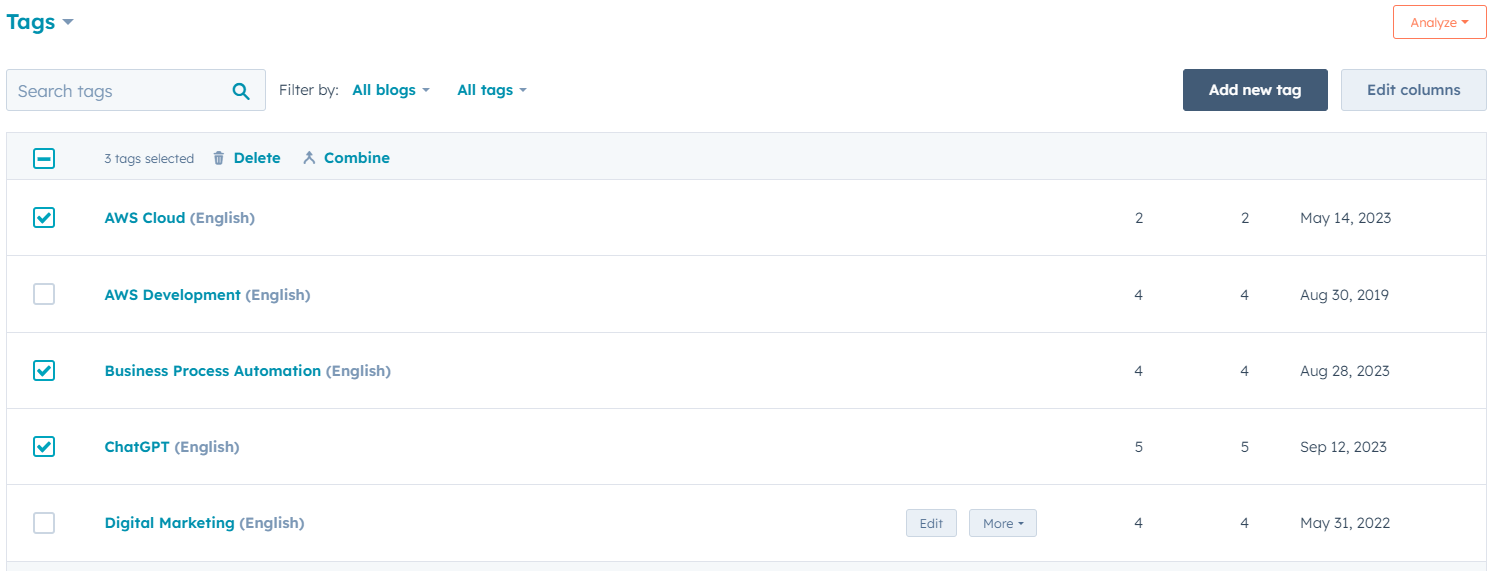
- Click "Add new tag" in the top right.
- Enter a name, select a language, and click "Create."
Edit a Blog Tag
To edit a blog tag in HubSpot:
- Go to Marketing > Website > Blog.
- Click Blog posts > Tags.
- Hover over the tag and click Edit.
- Enter the new tag name and click Update.
Combine Blog Tags
To combine tags in HubSpot:
- Go to Marketing > Website > Blog.
- Click Blog posts > Tags.
- Select checkboxes for tags to combine.
- Click Combine at the top.
- In the pop-up, choose a replacement tag from the dropdown menu.
Delete a Blog Tag
To delete a tag in HubSpot:
- Go to Marketing > Website > Blog.
- Click Blog posts > Tags.
- Hover over the tag, click More, and select Delete.
- Type "delete" in the text field and click Delete to confirm.
Add/Create a Tag for a Blog Post in the Editor
To add or edit tags in a HubSpot blog post:
- Go to Marketing > Website > Blog.
- Go over the blog post and click Edit.
- In the content editor, click File > Blog settings.
- To add an existing tag, choose it from the Tags dropdown.
- To create a new tag, type it and click + Add Tag to include it.
Click Publish or Update in the top right and then Publish now or Update now to go live.