%201-1.webp?width=148&height=74&name=our%20work%20(2)%201-1.webp)


Devising and storing automated emails intended for automation purposes is imperative to dispatch marketing emails seamlessly via workflows.
You can craft automated emails using the marketing email tool or generate them directly within the workflow tool.
Generating Automated Emails in the Email Editor
To Create an Automated Email using the Email tool, adhere to the following steps:
- Access your HubSpot account and proceed to the Marketing section, specifically the Email segment.
- Positioned in the upper right corner, click on "Create email."
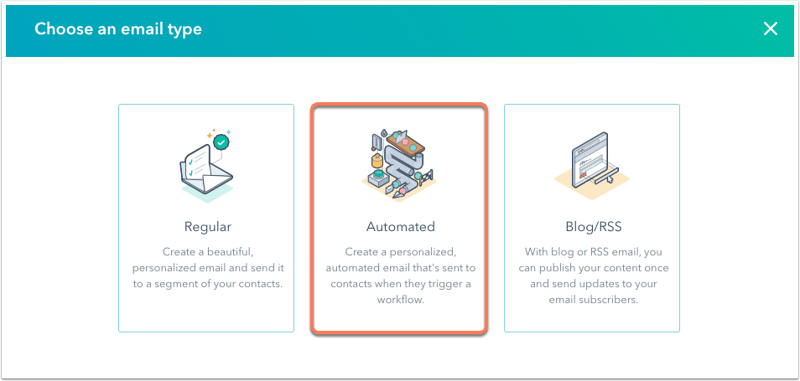
- Within the ensuing dialog box, opt for the "Automated" option.
- Select an appropriate Template.
- In the same dialogue box, assign a distinctive name to the email and click "Create an email."
Please Note: Be mindful that personalisation tokens related to deals or tickets can only be employed in their respective workflows. Conversely, contact and company personalisation tokens can be integrated into any workflow.
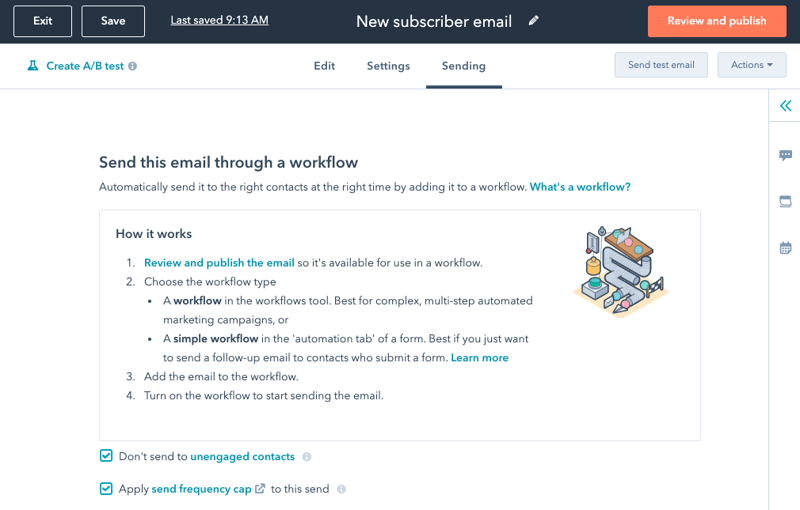
- Upon composing the email content and configuring the settings, navigate to the "Sending" tab.
- If you wish to exclude low-engagement contacts, mark the "Don't send to unengaged contacts" checkbox.
- For users with a Marketing Hub Enterprise account, a default send frequency cap is applied to prevent overwhelming a contact's inbox. To deactivate this feature, deselect the "Apply send frequency cap" checkbox.
- Located in the upper right corner, click "Review and publish" to make the automated email live.
Following publication, the automated email becomes available for selection within the "Send email" action within workflows.
Constructing Automated Emails within the Workflow Editor:
You can also create a straightforward automated email directly within the workflow editor. Emails crafted within the workflow tool will possess a basic appearance, which can be refined using the email editor.
To generate an automated email within the workflow tool, follow these steps:
- Access your HubSpot account and navigate to the Automation section, focusing on Workflows.
- Click on the name of an existing workflow or create a new one according to your needs.
- Click the "+" icon in the workflow editor to include a new workflow action.
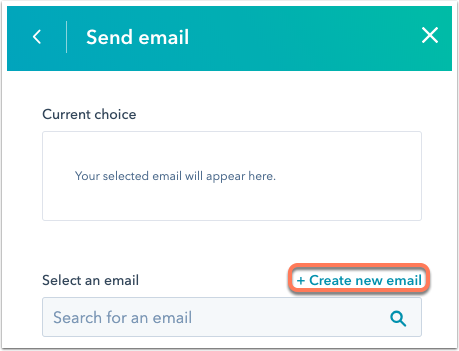
- In the panel on the right, select the "Send email" action.

- Click on "+ Create a new email."
- Within the panel on the right, input the email particulars. For advanced customisation, click the email tool link at the panel's top.
- Upon crafting the email content, save it by clicking "Save Email" at the bottom of the panel on the right.
Once saved, this email can be chosen for use across various workflows. It can also be accessed from your email dashboard for further refinements.
Please Remember: that modifying your automated email post-publication will not impact changes to the graymail suppression setting.