%201-1.webp?width=148&height=74&name=our%20work%20(2)%201-1.webp)


In today's digital world, making a strong first impression with your audience is crucial. Imagine if you could automatically greet every new user with a personalized welcome email that makes them feel valued and engaged. That's where HubSpot marketing automation comes in.
In this guide, We'll break down the process into easy-to-follow steps so you can confidently create emails that not only welcome but also set the stage for a fantastic user experience. Let's dive into the world of automation and discover how to make your communication strategy smarter, more efficient, and more impactful.
Pre-requisites
In the ever-evolving landscape of digital marketing, leveraging HubSpot's powerful tools can significantly enhance your communication strategy. Before delving into the world of automated emails and workflows, ensure you have the following prerequisites:
HubSpot account:
- Ensure you have a registered HubSpot account.
- Access to the Marketing Hub tools is essential.
Basic Knowledge:
- Familiarize yourself with fundamental email marketing concepts.
- Have a clear understanding of your target audience.
Content and Strategy:
- Develop a well-defined marketing strategy.
- Prepare relevant content assets for your campaigns.
List Organization:
- Ensure your contact lists are organized.
- Segment your lists for targeted communication.
Campaign Goals
Guide users towards maximizing engagement, enhancing customer experiences, and driving overall marketing success.
Phase 1
In this initial phase, we'll help you set the stage for automated welcome emails. Learn the basics, including what to include and tips for connecting with your audience effectively.
Creating Emails
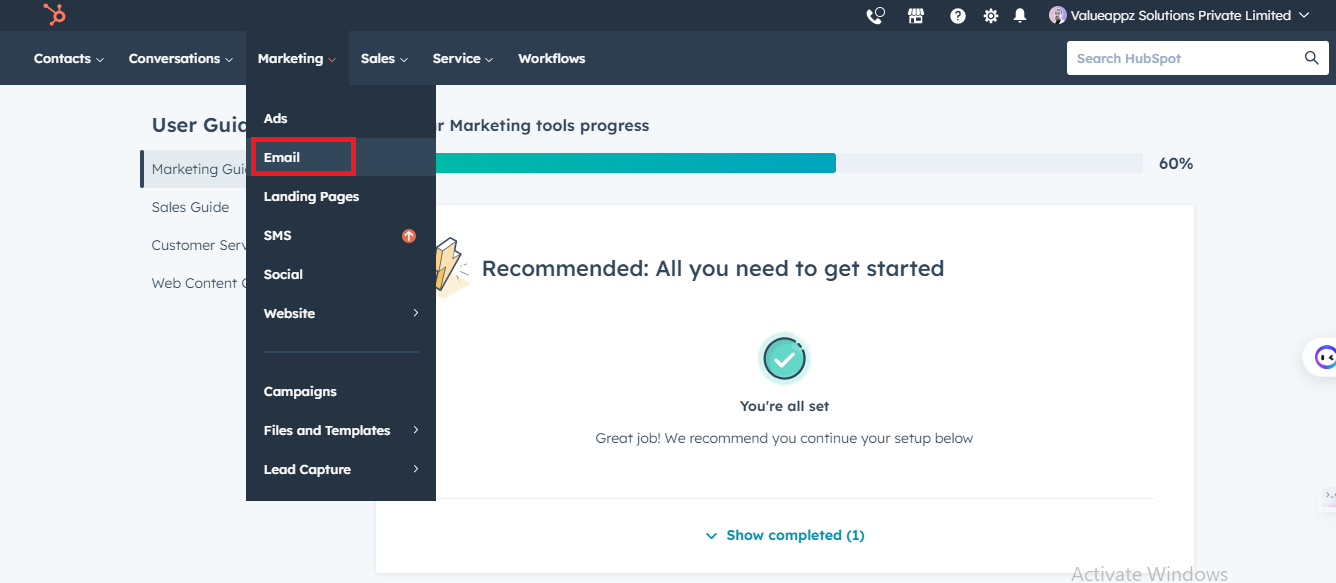
1. In your HubSpot account, navigate to Marketing > Email.
2. In the upper right, click Create email.
3. I have created three emails for this campaign. You can check it in the templates below that I have created specially for this campaign.
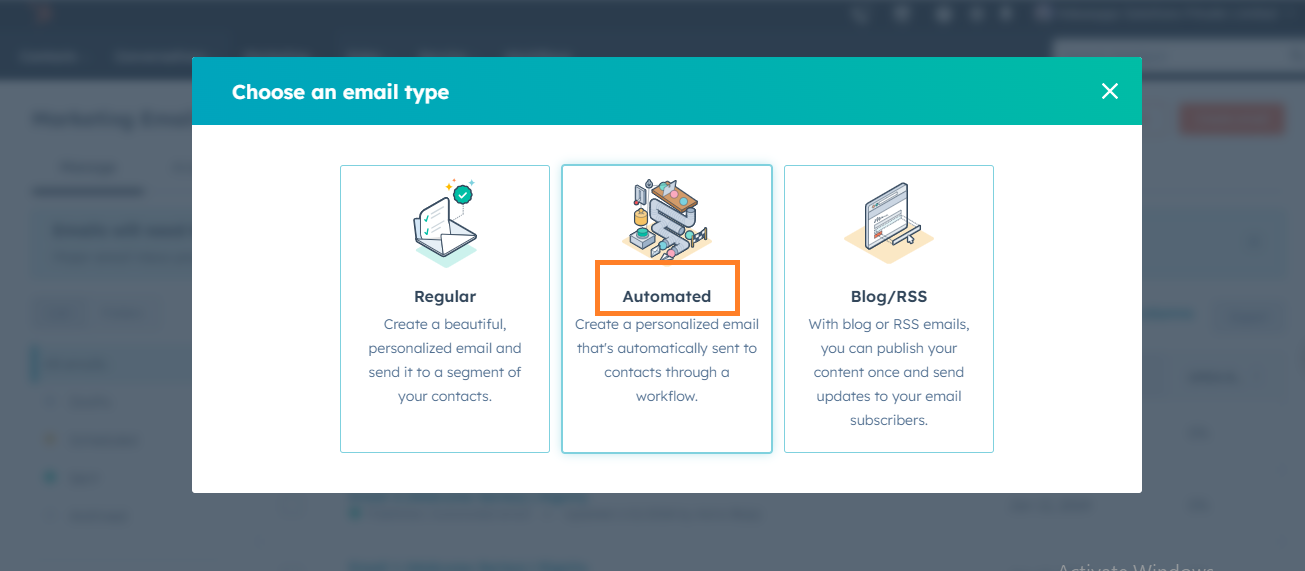
4. In the dialog box, select Automated.
5. Select a template, or you can use a new template and customize an email
6. In the dialog box, enter an Email name and click Create email.
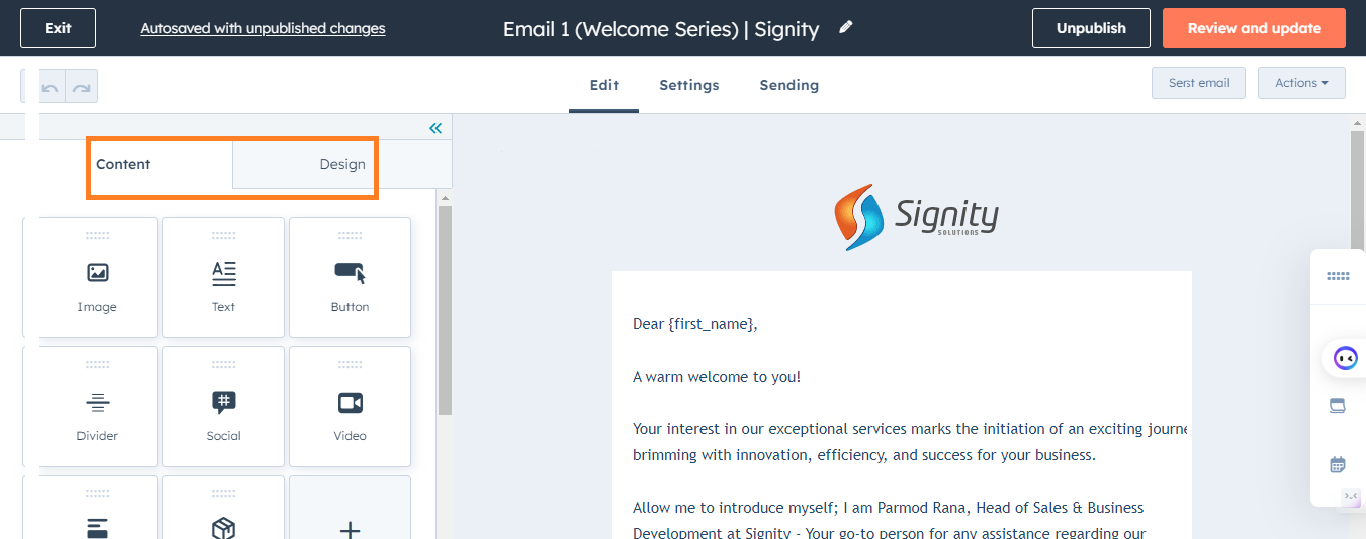
7. You can choose different options to design your email from the top left corner.
8. After composing and setting up the email, click the Sending tab.
9. In the upper right, click Review and Publish to publish the automated email.
Email Templates
Here are the email templates for your reference.
Template Mail 1:
|
Hi {first_name}, A warm welcome to you! Your interest in our exceptional services marks the initiation of an exciting journey brimming with innovation, efficiency, and success for your business. Allow me to introduce myself; I am XYZ, Head of Sales & Business Development at ABC Company - Your go-to person for any assistance regarding our services. We are eager to align our tailored solutions with your unique goals, ensuring a seamless integration of our services into your business strategy. Feel free to explore the diverse range of services we offer. Our dedicated team is ready to connect to understand the specifics of your business needs and craft a customized approach to address them. Thank you once again for considering Signity as your strategic partner. I personally look forward to the opportunity to collaborate with you and contribute to the flourishing story of your business. Thanks & Regards, |
Template Mail 2:
|
Hi {first_name}, Exciting times are ahead! And I can't wait to share how "XYZ" can bring a burst of innovation to your doorstep, addressing both your immediate needs and long-term aspirations. Who We Are:
What We Offer: Our tailored solutions encompass a range of services, including
Let's dive into the possibilities and unlock the next chapter of your business together. Best Regards |
Template Mail 3:
|
Dear [ {first_name}, I hope you're doing well. At XYZ, we are excited to showcase our capabilities and the impactful solutions we've crafted for clients like you. We invite you to explore our recent case studies, highlighting the diverse range of projects we've successfully executed:
Our case studies showcase our commitment to exceptional outcomes and tailored solutions guided by a consultative approach aligned with client goals. We believe that our past successes can serve as a preview of the potential collaboration we could embark upon. Should you have any questions or require further information, please feel free to reach out. We are eager to discuss how we can tailor our services to meet your specific needs. We look forward to the opportunity to showcase our expertise and contribute to the success of your future projects. Best Regards |
Phase 2
Steps to Create the Welcome Workflow:
Now, our emails are ready. We can create a workflow and use these emails in this workflow.
Creating workflows in HubSpot is a strategic way to automate and streamline your marketing, sales, and customer service processes. Here's a step-by-step guide to help you set up this customer engagement workflow in HubSpot:
- In your HubSpot account, navigate to Automation > Workflows.
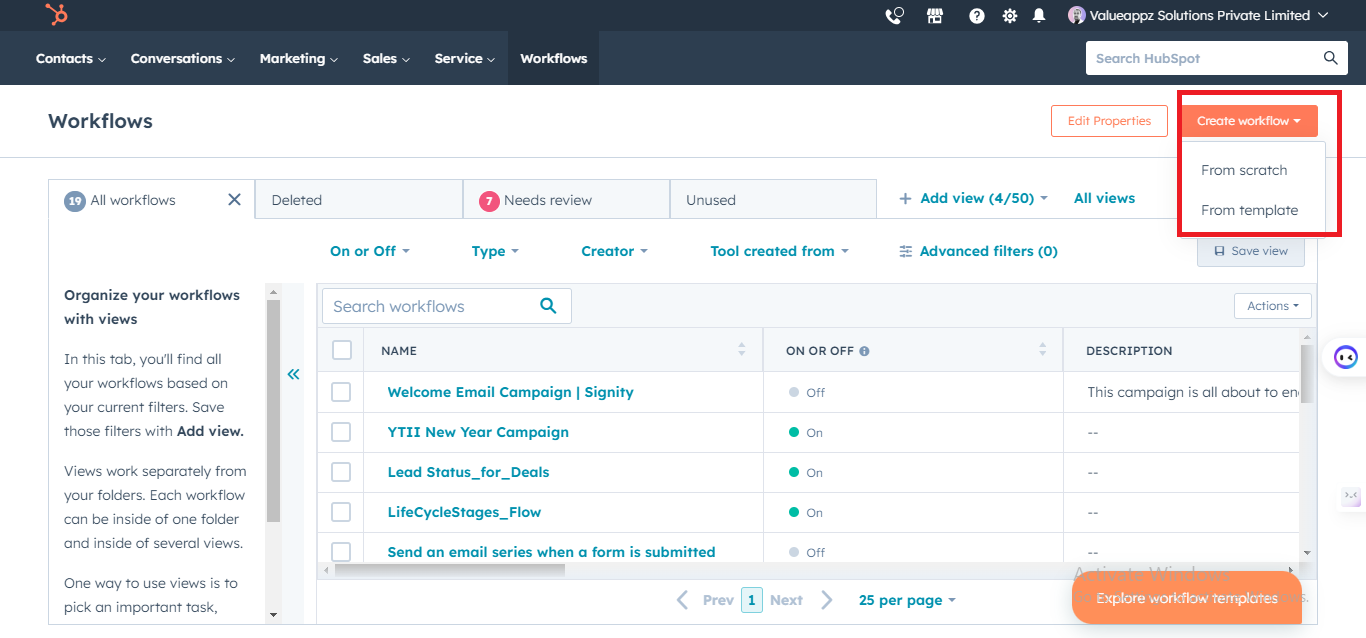
You can create a new workflow from scratch or a template:
- To create a new workflow from scratch, in the upper right, click Create workflow > From scratch.
- To create a new workflow from a template, in the upper right, click Create workflow > From template.
- To edit or clone existing workflows, hover over the workflow and click Clone or Edit.
- In the left panel, under Choose type, select your workflow type.
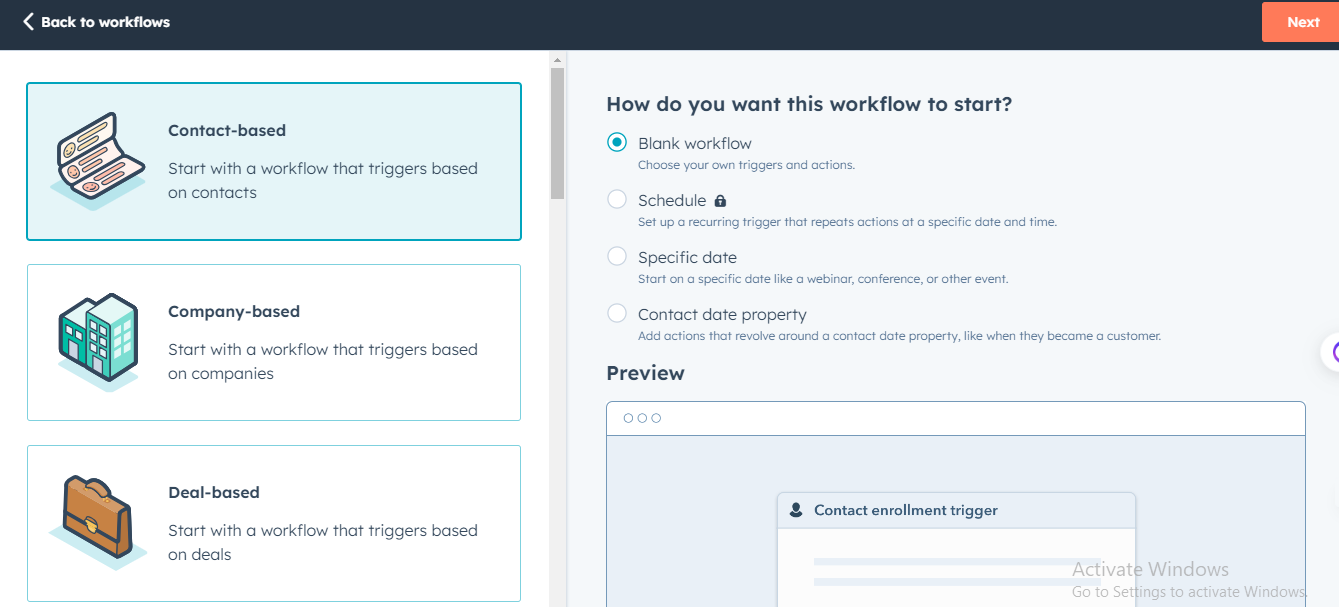
- Click Next.
- Click the edit pencil icon to give your workflow a name and add a description. Click Generate.
- Click Save.
- In the workflow editor, click Set up triggers.
- In the left panel, select When an event occurs or When filter criteria are met.
- In the left panel, select a filter type for your enrollment trigger. Set up the trigger, then click Save.
- You can add different triggers in the workflow by clicking on the trigger button.
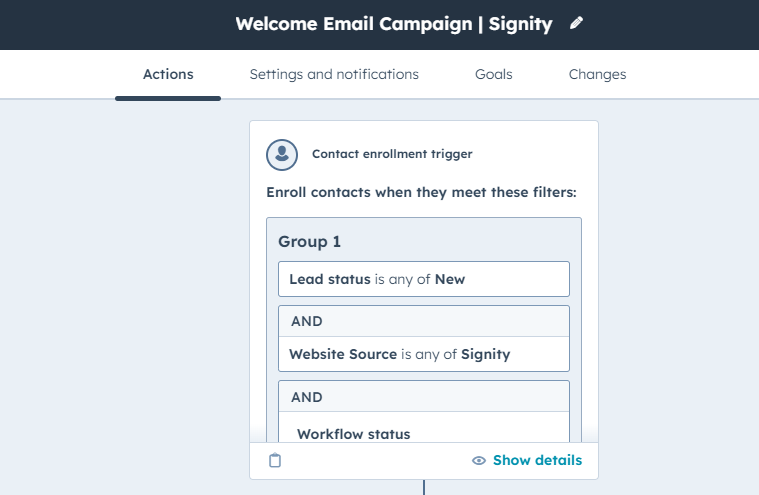
- Now, after creating the enrollment status and using so many filters according to your campaigns, move to the next step.
- I'm initially setting a 1-day delay to allow our contact some time to reply.
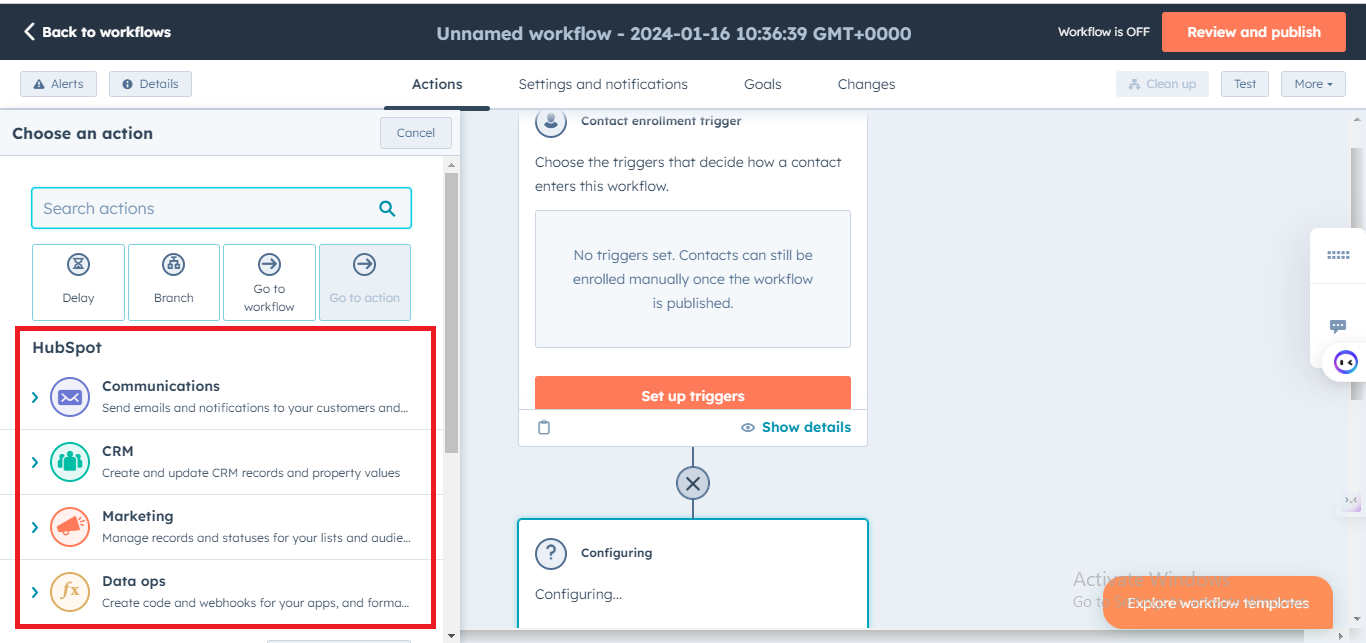
You can attach the automated emails from the communication option on the left of the dashboard.
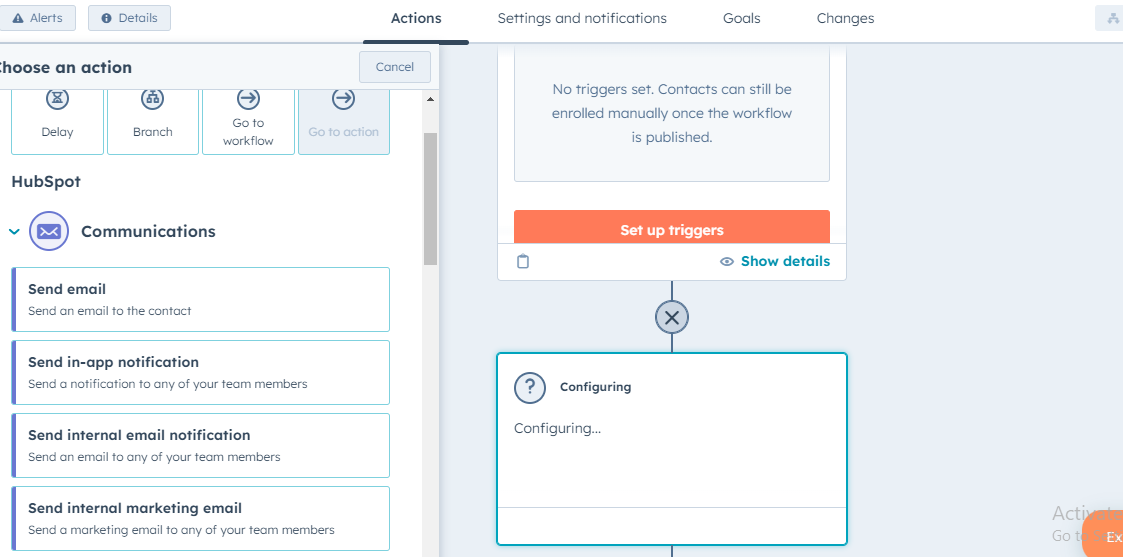
- From the communication, please attach the first email from the template.
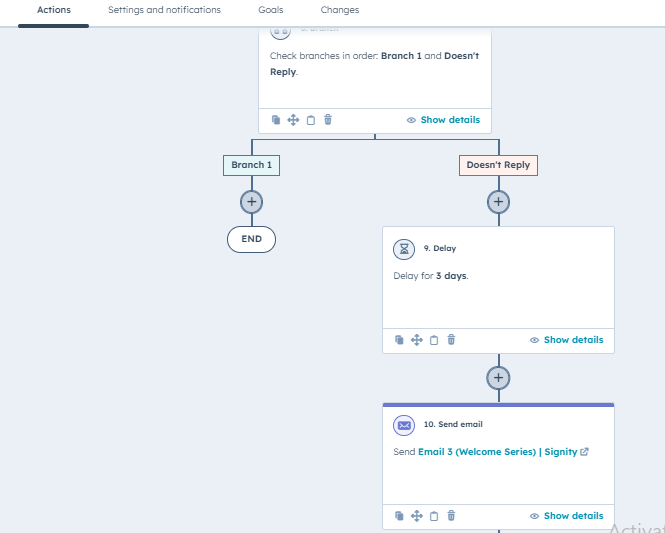
- In the left panel, select Branch.
- Configure the branch based on the selected type.
- Based on matching filter criteria (If/then).
- Once you're done, click Save.
- To clone a branch, hover over the branch, then click the duplicate clone icon.
- To delete a branch, hover over the branch, then click the delete icon.

Add Actions After the Branch
- Click the + plus icon to add an action under If a Replied branch.
- If the customer replies, then this campaign will end for him; if not, then we will send him a 2nd email after the delay of 3 more days.
- Repeat the same steps one more time and use the 3rd email template.
- Review the rest of your workflow settings, including connections and unenrollment, then click Turn on.
- In the dialog box, click Yes, and turn it on.
Conclusion
This guide empowers you to optimize user onboarding with HubSpot CRM's automated welcome emails and workflows.
 Elevate engagement, leave a lasting impression, and drive success in the digital landscape.